Making a water bottle holder can be a fun and practical DIY project. In this step-by-step guide, we will walk you through the process of creating your very own water bottle holder from scratch. From selecting the materials to assembling the final product, you will learn all the necessary steps to make a functional and stylish holder for your water bottle.
Key Takeaways
- Selecting the right fabric is crucial for the durability and appearance of the water bottle holder.
- Adding reinforcements to the fabric pieces will enhance the strength and longevity of the holder.
- Attaching straps securely is essential for comfortable and convenient use of the holder.
- Creating pockets in the holder can provide additional storage space for small items.
- Finalizing the design with attention to detail will give your water bottle holder a polished and professional look.
Materials Needed
Gather Required Supplies
Once you’ve decided to create your own water bottle holder, the first step is to gather all the necessary supplies. This will ensure that you have everything you need at hand before you begin, making the process smoother and more enjoyable. Start by listing out all the materials you’ll need, such as fabric, thread, needles, and any embellishments you want to add.
Here’s a basic list to get you started:
- Durable fabric (canvas or denim works well)
- Coordinating thread
- Sewing machine or needle for hand sewing
- Scissors or fabric cutter
- Measuring tape or ruler
- Pins or fabric clips
- Optional: Decorative elements like buttons or patches
Remember, the type of fabric you choose can add a personal touch to your holder, much like the free crochet water bottle holder patterns that offer a unique and handmade feel. Additionally, consider the size and shape of your water bottle when selecting materials. For instance, a 3-Tier Bottle Storage Holder Rack might inspire you to create a holder with multiple compartments. The goal is to control the chaos of scattered bottles, similar to how simple water bottle storage ideas can organize a kitchen.
Select Suitable Fabric
After gathering all the necessary supplies, it’s time to focus on selecting the right fabric for our water bottle holder. The fabric you choose is not just a matter of aesthetics; it’s about functionality and durability as well. Consider the type of water bottle you’ll be carrying—will it be a heavy-duty stainless steel bottle or a lighter plastic one? This decision will influence the fabric’s weight and strength requirements.
For a sturdy holder, materials like canvas or denim are excellent choices. They offer the resilience needed for heavier bottles. If you’re aiming for a lighter holder, perhaps for a small plastic bottle, a lighter cotton or even neoprene could be suitable. Remember, the fabric should also be easy to clean and resistant to water.
Here’s a quick guide to help you decide:
- Heavy bottles: Opt for thicker fabrics like canvas or denim.
- Light bottles: Consider lighter materials like cotton or neoprene.
- Style: If you’re looking for something trendy, a checkered pattern or a customizable fabric might catch your eye.
- Comfort: Ensure the fabric feels good in hand, especially if you’re going for a neoprene with a high softness touch.
Your fabric choice sets the stage for the entire project, so take your time and pick something that will meet your needs and reflect your personal style.
Choose the Right Tools
Once you’ve selected the perfect fabric for your water bottle holder, it’s time to focus on the tools that will bring your project to life. Choosing the right tools is crucial for a smooth crafting experience and a durable end product. You’ll need a reliable sewing machine that can handle the fabric you’ve chosen. Additionally, a sharp pair of scissors is essential for cutting your fabric with precision.
Here’s a list of the basic tools you’ll need:
- Sewing machine
- Fabric scissors
- Measuring tape
- Pins or fabric clips
- Thread (preferably heavy-duty if you’re working with thicker materials)
- Seam ripper (just in case of mistakes)
Remember, the quality of your tools can make a significant difference. For instance, a good sewing machine can handle the heavy water bottles with ease, ensuring that your holder is both functional and aesthetically pleasing. Moreover, investing in ergonomic tools, like a comfortable pair of scissors, can prevent fatigue during the cutting process, much like how an easy to lift handle makes carrying water bottles more manageable.
Preparing the Fabric
Cutting the Fabric Pieces
After selecting the perfect fabric for our water bottle holder, it’s time to start shaping it into something functional. Cutting the fabric accurately is crucial; it sets the foundation for the entire project. I begin by laying out the fabric on a flat surface, ensuring there are no wrinkles or folds that could distort the measurements.
Following the pattern, I carefully measure and mark the dimensions needed for each piece. For precision, I use a tailor’s chalk or a fabric marker, which are easily visible and can be removed after cutting. Here’s a simple list of the pieces I cut out:
- Main holder body
- Straps
- Pockets
- Reinforcement patches
Once all the pieces are cut, I double-check the measurements against the pattern. This step reminds me of a macrame water bottle holder tutorial I once watched, where they emphasized the importance of measuring and cutting the cords accurately. Similarly, in sewing, ensuring that each piece is cut to the right size is essential for the final product to come together seamlessly.
Sewing the Fabric Edges
Once you’ve cut your fabric pieces to the correct dimensions, it’s time to sew the edges to prevent fraying and to give your water bottle holder a polished look. Start by folding over the edges about a quarter of an inch and press them with an iron to create a crisp edge. Here’s a simple step-by-step to ensure your sewing is neat and durable:
- Thread your sewing machine with a thread color that matches or complements your fabric.
- Set your sewing machine to a straight stitch setting.
- Begin sewing a quarter inch from the edge of the fabric, backstitching at the start and end to secure the thread.
- Sew all the way around the piece, pivoting at the corners to maintain a consistent seam allowance.
After sewing, I like to follow a tip I found in a guide titled ‘How to Make Your Own Hot Water Bottle Cover – Cloth House,’ which suggests to turn each sewn piece inside out and poke out the corners for a professional finish. Iron the pieces flat and then carefully close any openings with a whip stitch. This technique not only reinforces the edges but also gives the holder a cleaner look.
Remember, the quality of your sewing will greatly impact the durability and appearance of your water bottle holder. As mentioned in the ‘Coral Water Bottle Holder Digital Sewing Pattern,’ it’s important to choose the right fabric, preferably woven fabrics, which are ideal for this kind of project. And don’t forget, practice makes perfect. If you’re new to sewing, you might want to try a few practice runs on scrap fabric before moving on to your selected material.
Adding Reinforcements
With the fabric edges neatly sewn, it’s time to add reinforcements to ensure our water bottle holder can withstand the weight and frequent use. Think of the reinforcement like the sturdy frame of a water bottle storage rack, providing that extra layer of durability.
For this step, I’ll be using a heavy-duty interfacing. This material will give the holder a firm structure, much like the carbon steel used in commercial water bottle racks. It’s important to cut the interfacing to match the size of your fabric pieces before ironing it onto the wrong side of the fabric.
Here’s a quick checklist to make sure you’ve got everything in place:
- Heavy-duty interfacing cut to size
- Iron set to the appropriate temperature
- A clean, flat surface for ironing
Once the interfacing is securely attached, our holder will have a solid foundation, similar to the reinforcement frame found in high-quality water jug racks. This step is crucial for a long-lasting and functional holder that can easily be attached to a pack’s hip belt for efficient access and support.
Assembling the Holder
Attaching Straps
Once we’ve prepared the fabric and added reinforcements, it’s time to focus on attaching the straps to our water bottle holder. This step is crucial as it will determine how comfortably you can carry your bottle around. I’ve decided to go for a simple attachment method that will fit most any size bottle, much like the EasyAcc Water Bottle Handle Shoulder Strap I came across on Amazon. It’s very lightweight and has that smooth seatbelt feel to it.
For the straps, I’m using a durable material that will provide a secure grip, similar to the OHMY FIT Silicone Magnetic Ring Handle Strap. This ensures that the holder can attach to most stainless steel insulated straw wide mouth bottles, offering both convenience and security. Here’s a quick rundown of the steps:
- Measure the length of the strap according to your comfort and the size of the bottle.
- Sew the ends of the straps to the sides of the holder, ensuring they’re evenly placed.
- Test the strength of the attachment with a full bottle to make sure it’s secure.
Remember, the goal is to create a holder that not only fits your bottle like a glove but also allows for quick and easy access to your liquid of choice. The Bottle Rocket by Gossamer Gear is a great example of this, designed to fit 500ml – 1000ml smart water bottles perfectly.
Creating Pockets
After attaching the straps to our water bottle holder, it’s time to add a personal touch with some functional pockets. These pockets can be a great place to store small items like keys or a phone while you’re on the go.
To create the pockets, I start by measuring the size I want them to be. I then cut out the fabric pieces, fold the edges for a clean finish, and sew them onto the holder. It’s a straightforward process, but here’s a quick rundown:
- Measure the desired pocket size.
- Cut the fabric to size, adding a half-inch on each side for seams.
- Fold the edges and iron them flat for a neat edge.
- Sew the pockets onto the holder in your chosen locations.
Remember, the number and size of pockets can vary based on your needs. Some might prefer a single large pocket, while others might opt for multiple smaller ones. The key is to customize the holder to make it the most useful for you. As I work on this step, I’m reminded of the Oasis Bottle Holder pattern, which turns ordinary fabric into a masterpiece, cradling your water bottle with love and providing handy storage space.
Finalizing the Design
With the straps securely in place and pockets neatly stitched, it’s time to finalize the design of our water bottle holder. This is where personal flair comes into play. You can customize your bottle holder to suit your style or needs. For instance, you might want to add decorative elements such as embroidery or patches.
Here’s a quick checklist to ensure you’ve covered all the bases:
- Check all seams for strength and durability.
- Trim any excess threads for a clean finish.
- Test the fit with your water bottle to ensure a snug and secure hold.
Remember, the goal is to create a holder that is not only functional but also aesthetically pleasing. A well-crafted water bottle holder can be a stylish accessory for your daily activities or outdoor adventures. Take inspiration from popular designs, like the sleek and simple stackable plastic water bottle holder or the custom stainless steel cycling water bottle that fits perfectly in a bicycle holder. The final product should be a reflection of your craftsmanship and creativity.
Conclusion
In conclusion, creating a water bottle holder is a fun and practical DIY project that can be easily accomplished with just a few materials and steps. By following this step-by-step guide, you can customize your own water bottle holder to suit your style and needs. Whether you’re looking to stay hydrated on the go or want to add a personal touch to your accessories, making a water bottle holder is a rewarding and creative endeavor. So, grab your supplies and get started on crafting your very own water bottle holder today!
Frequently Asked Questions
What type of fabric is best for making a water bottle holder?
A sturdy and water-resistant fabric like nylon or canvas works well for making a water bottle holder.
Do I need a sewing machine to make a water bottle holder?
While a sewing machine can make the process faster, you can also hand-sew the fabric pieces together for a water bottle holder.
Can I customize the size of the water bottle holder?
Yes, you can adjust the dimensions of the fabric pieces to accommodate different sizes of water bottles.
How do I attach the straps securely to the water bottle holder?
You can reinforce the attachment points with extra stitching or use heavy-duty hardware like buckles for added security.
Is it necessary to add reinforcements to the fabric edges?
Adding reinforcements like bias tape or double stitching can enhance the durability of the water bottle holder.
Can I wash the water bottle holder?
Check the fabric care instructions, but most water bottle holders made from durable fabrics can be hand-washed or spot-cleaned.
Effortless Guide to Mixing Protein Shakes using a Blender Bottle

Effortless Guide to Mixing Protein Shakes using a Blender Bottle
In the bustling rhythm of our daily lives, maintaining an active lifestyle becomes a pivotal aspect of ensuring a healthy and balanced life. For many of us, protein shakes have become a staple, providing essential nutrition in a convenient manner. But let’s face it, we’ve all been through the struggle of finding the perfect method to mix protein shakes without leaving behind a clumpy mess. That’s where the magic of advanced mixing solutions in blender bottles comes into play. In this guide, I will walk you through the effortless journey of mixing your protein shakes using a blender bottle, ensuring you get that perfectly smooth shake every time.
The Evolution of Protein Mixing Methods
Traditional Methods of Mixing Protein Shakes
In the early days of protein shake enthusiasts, the common method of mixing involved using a glass and a spoon, or at best, a manual whisk. The process was often messy, time-consuming, and rarely resulted in a perfectly mixed drink. Lumps of protein powder floating in the liquid were a common, unappetizing sight, and ensuring that the protein powder is thoroughly mixed was a challenge.
Introduction to Modern Mixing Solutions: Shaker Bottles
Enter the era of shaker bottles – a revolutionary solution that transformed the mixing experience for fitness enthusiasts and individuals leading an active lifestyle. The shaker bottle, with its simple yet effective design, promised a lump-free, smooth protein shake, without the hassle and mess of traditional mixing methods. The ease of adding your desired protein powder and liquid, securing the lid, and shaking vigorously to mix has made it a popular choice among many.
The Rise of Advanced Mixing Solutions
The evolution didn’t stop there. With advancements in technology and design, the humble shaker bottle underwent numerous transformations, giving rise to advanced mixing solutions that ensured an even smoother, perfectly blended protein shake. The introduction of elements like the patented blenderball wire whisk into the blender bottle models made a significant difference in the mixing experience, ensuring that every particle of protein powder is effectively mixed, providing a smooth, enjoyable protein drink.
Unveiling the Blender Bottle
What is a Blender Bottle?
A blender bottle is not just a bottle; it’s a versatile mixing container designed to simplify the process of mixing various ingredients, primarily popular among the fitness community for protein shakes. The key feature that sets a blender bottle apart from a regular bottle is its patented mixing system featuring the BlenderBall, a wire whisk that ensures smooth, lump-free results every time.
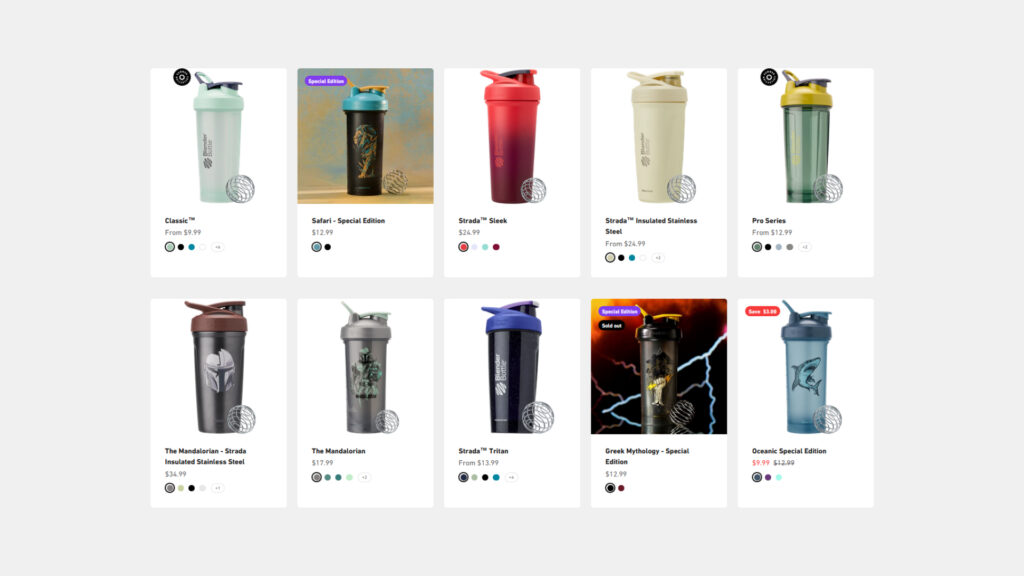
Different Models and Types
Blender bottles come in various shapes, sizes, and designs, each catering to different needs and preferences. From the classic shaker cup to insulated stainless steel shaker bottles that keep your beverages cold for up to 24 hours, there’s a blender bottle for everyone. Some bottles feature measurement markings on the side, allowing you to measure your ingredients accurately, while others prioritize a sleek design to ensure a comfortable grip and aesthetic appeal.
Why Choose a Blender Bottle?
Choosing a blender bottle is synonymous with choosing convenience and efficiency. Whether you’re mixing protein powder, meal replacement shakes, or even salad dressings, the blender bottle ensures that your beverages are mixed to perfection. The spill-proof lid and leak-proof design mean you can shake vigorously without worrying about making a mess, making it the perfect companion for your fitness journey.
Dive into the Advanced Mixing Solutions
The Patented Mixing System
The patented mixing system featuring the BlenderBall is what truly sets the blender bottle apart. This simple yet effective mechanism ensures that your protein powder is thoroughly mixed, providing a smooth, enjoyable drinking experience. Simply add your desired ingredients, drop the ball inside, secure the lid, and shake. The whisk will move freely inside the bottle, mixing your drink to a smooth consistency.
B. Benefits of Using a Blender Bottle
The blender bottle is perfect for those with a busy schedule who cannot afford to spend time mixing their shakes manually. It’s also a great option for those who are often on the move, as it ensures you can have a perfectly mixed shake whenever you need it, whether you’re at the gym, in the office, or on a hiking trail.
C. Ensuring a Smooth Mix Every Use
The wire whisk into the blender bottle ensures a lump-free mix every time, allowing you to enjoy a smooth, delicious shake without the unpleasant surprise of unmixed powder. The ease of use and guaranteed smooth results make the blender bottle a staple in the fitness community.
VI. Exploring the Shaklee Blender Bottle®
Overview and Unique Features
The Shaklee Blender Bottle® is renowned for its quality and durability, offering a perfect blend of style and performance. With its patented BlenderBall wire whisk, it ensures that your shakes are always perfectly mixed. Moreover, the Shaklee Blender Bottle® is designed to be your perfect companion for an active lifestyle, ensuring that your beverages stay fresh and appetizing even during prolonged use.
B. Why Choose Shaklee Blender Bottle®?
The Shaklee Blender Bottle® is not just a mixing container; it’s a testament to a lifestyle that prioritizes health, convenience, and style. With its sleek design and proven functionality, it stands out among the myriad of shaker bottles available on the market.
C. Mixing Everything from Shaklee Protein Shakes to Salad Dressings
The Shaklee Blender Bottle® is perfect for mixing everything from Shaklee protein shakes to salad dressings, ensuring that you have a versatile tool that can cater to all your mixing needs. Whether you’re preparing a post-workout shake or a dressing for your salad, the Shaklee Blender Bottle® ensures consistency and quality in every mix.
The Insulated Stainless Steel Shaker Bottle
A. Introduction to Insulated Stainless Steel Shaker Bottles
The insulated stainless steel shaker bottle is a marvel in the world of fitness enthusiasts and health-conscious individuals. With its double-wall insulation to keep your beverages cold for extended periods, it’s not just a bottle but a reliable companion that ensures your drinks stay refreshingly cool, especially during those intense workout sessions or hot summer days.
B. Benefits of Using an Insulated Stainless Steel Shaker Bottle
Imagine going for a long run and having a sip of your still-cold protein shake even after hours – that’s the magic of the insulated stainless steel shaker bottle. Not only does it keep your drinks cold for up to 24 hours, but it also ensures that the taste and quality of your beverage remain intact, providing a refreshing experience whenever you need it.
C. The Perfect Blend of Style and Performance
With a perfect blend of style and performance, the insulated stainless steel shaker bottle is not just a utility but a style statement. Its sleek design, coupled with its unparalleled functionality, makes it a popular choice among those who seek efficiency without compromising on style.
The Patented BlenderBall – A Deep Dive
A. What is the Patented BlenderBall?
The patented BlenderBall is a wire whisk designed to provide a smooth, lump-free consistency to your shakes and drinks. Made from surgical-grade stainless steel, the BlenderBall moves freely throughout the bottle as you shake it, ensuring that your ingredients are mixed to perfection, providing a smooth, enjoyable drinking experience.
B. Revolutionizing the Mixing Experience
The introduction of the patented BlenderBall wire whisk into the blender bottle has revolutionized the mixing experience, ensuring that every particle of your ingredients, from protein powders to meal replacement shakes, is thoroughly mixed, eliminating the issue of lumps and unmixed particles in your drink.
C. Ensuring Consistency and Quality in Every Sip
The patented BlenderBall ensures that your beverages are not just well-mixed but also that the consistency is maintained from the first sip to the last. This ensures that you enjoy a uniform, smooth texture throughout your drink, enhancing your drinking experience and ensuring that you receive the full benefits of your beverage.
The Perfect Companion for an Active Lifestyle
A. Catering to an Active and Busy Lifestyle
In a world where every minute counts, the blender bottle emerges as a hero, ensuring that your nutritional needs are met even in the midst of a hectic schedule. Whether you’re rushing to a meeting post-gym session or squeezing in a quick workout during your lunch break, the blender bottle ensures that your protein shake is always ready when you are.
B. Convenience and Portability
The blender bottle, with its leak-proof design and convenient size, ensures that you can carry it wherever you go without worrying about spills and leaks. Its compact design allows it to fit comfortably in your gym bag, backpack, or even your car’s cup holder, ensuring that you can enjoy a perfectly mixed shake whenever and wherever you need it.
C. Ensuring Nutritional Needs are Met
The ease of use and the efficiency of the blender bottle ensure that your nutritional needs are not compromised, even with a busy schedule. A quick shake of the bottle gives you a smooth, nutritious shake that caters to your dietary and nutritional requirements, ensuring that you’re fuelled and energized throughout the day.
Ensuring a Healthy Lifestyle with Blender Bottles
The Role of Protein Shakes in a Healthy Lifestyle
Incorporating protein shakes into our diet is not merely a trend but a convenient way to ensure we’re meeting our daily protein requirements, especially crucial for those leading an active lifestyle. Protein is pivotal in repairing and building muscles, and having a shake post-workout can significantly aid in recovery and muscle development.
Promoting a Healthy Lifestyle with a Blender Bottle
The blender bottle is not just a tool but a gateway to maintaining a healthy lifestyle. It allows us to prepare nutritious shakes effortlessly, ensuring we don’t skip our essential nutrition amidst our busy schedules. From protein shakes to salad dressings, the blender bottle ensures that we can have healthy options on hand at all times.
Convenience Equals Consistency
The ease and convenience that a blender bottle brings to our lives ensure consistency in maintaining our nutritional intake. This consistency is key in adhering to a healthy lifestyle, ensuring that our body receives the necessary nutrients regularly, thereby supporting our overall well-being and physical health.
Common Questions Around Blender Bottles
A. Addressing FAQs
- How does the BlenderBall ensure a smooth mix? The BlenderBall whizzes through the liquid, agitating the ingredients and ensuring a smooth, lump-free mixture.
- Can the blender bottle mix other beverages? Absolutely! From smoothies to pancake batter, the blender bottle can mix a variety of ingredients.
- How to clean a blender bottle? Most blender bottles are dishwasher safe. Simply disassemble the lid, the BlenderBall, and wash them separately to maintain hygiene.
B. Solutions and Tips
Ensuring that the lid is securely fastened, using lukewarm water for easier mixing, and cleaning the bottle immediately after use to prevent odor are some tips that users might find handy.
C. Troubleshooting Common Issues
Addressing issues like removing persistent odors, dealing with stains, and ensuring the longevity of the blender bottle will provide readers with practical insights and enhance their user experience.
Conclusion
Summarizing Key Takeaways
In our journey through the world of blender bottles, we’ve explored its evolution, the revolutionary BlenderBall, and how it has made maintaining a healthy, active lifestyle more convenient and efficient.
Encouraging Exploration
I encourage you to explore the world of blender bottles, discovering the ease it brings into maintaining your nutritional needs, and ensuring that every shake you make is smooth, lump-free, and delicious.
C. Final Thoughts
As we wrap up our guide, remember that the blender bottle is not just a mixing container but a tool that supports your healthy, active lifestyle, ensuring that you’re fueled and ready to face the challenges of your day.
Key Takeaways
- The blender bottle, with its patented BlenderBall, ensures a smooth, lump-free shake every time.
- It supports an active lifestyle by providing a convenient solution to meet our nutritional needs.
- Addressing common questions and providing solutions enhances the user experience and ensures longevity in using blender bottles.
FAQs
- How to prevent protein shakes from being clumpy? Ensure the BlenderBall is inside and shake vigorously.
- Can the blender bottle keep beverages hot? It’s recommended to use it for cold beverages as hot liquids might build pressure inside the bottle.
- Is it safe to store beverages in the blender bottle overnight? Yes, ensure it’s sealed properly and stored in a cool place.
6 Steps to Keeping Your Blender Bottle clean always

As a smoothie enthusiast, I know how important it is to have a clean and odor-free blender bottle. Not only does it affect the taste of your drink, but it also impacts your health. Cleaning your blender bottle may seem like a chore, but it’s a crucial step in maintaining its longevity and preventing the buildup of harmful bacteria.
In this section, I will cover essential tips and techniques for effectively cleaning your blender bottle, ensuring it stays germ-free and in optimal condition.
Importance of Cleaning Blender Bottles Regularly
As someone who uses a blender bottle frequently, it’s essential to understand the importance of regular cleaning. Whether you use it for protein shakes, smoothies, or juices, your blender bottle is prone to collecting bacteria and germs, especially if it isn’t cleaned regularly.
Not only does cleaning your blender bottle help maintain proper hygiene, but it also helps eliminate any lingering odors that can affect the taste of your drinks. Regular cleaning also ensures that your blender bottle remains in optimal condition, preventing any damage or wear and tear over time.
Easy Cleaning Tips for Blender Bottles
- Wash your blender bottle after every use with hot, soapy water. This helps remove any leftover residue and buildup.
- Use a specialized bottle brush to clean hard-to-reach areas, such as the bottom or the cap.
- For tough stains, use a mixture of baking soda and water and let it sit for a few hours before rinsing with warm water.
- Avoid using harsh chemicals or abrasive sponges that can damage the bottle’s surface.
- Thoroughly dry your blender bottle before storing it to prevent any mold or mildew growth.
By following these easy cleaning tips, you can keep your blender bottle spotless and ready for your next use. Plus, it only takes a few minutes out of your day to ensure your blender bottle remains germ-free and in excellent condition.
Gathering the Right Cleaning Supplies
Before diving into the cleaning process, it’s important to have the necessary cleaning supplies to make the process easier and more effective. Here are the essential cleaning products you’ll need:
- Warm water: Water is a natural cleaning agent and is effective in keeping your blender bottle clean and free of germs.
- Dish soap: A mild dish soap is gentle enough to use on your blender bottle and will effectively remove any dirt or grime.
- Baking soda: Baking soda is a natural deodorizer and can effectively eliminate any lingering odors in your blender bottle.
- Vinegar: White vinegar is a natural disinfectant that can effectively kill bacteria and germs in your blender bottle.
- Cleaning brush: A long-handled cleaning brush with soft bristles can effectively reach all areas of your blender bottle, including the hard-to-reach spots.
Once you have gathered all the necessary cleaning supplies, it’s important to ensure they are clean and free of any dirt or grime before use. I recommend washing your cleaning brush and any sponges or towels you will be using with hot, soapy water and rinsing them thoroughly.
Step-by-Step Guide to Cleaning Blender Bottles
Cleaning your blender bottle may seem like a daunting task, but with the right strategies, it can be quick and effortless. Here’s a step-by-step guide to effectively clean your blender bottle:
Step 1: Disassemble the Blender Bottle
First, take apart all the components of your blender bottle, including the lid, straw, and blender ball. This will make it easier to clean every nook and cranny of the bottle.
Step 2: Rinse the Blender Bottle
Rinse the blender bottle with warm water to remove any residue or leftover smoothie. Be sure to rinse the lid, straw, and blender ball as well.
Step 3: Use a Cleaning Solution
Add a small amount of dish soap to the blender bottle. Fill the bottle 1/3 of the way with warm water, add the blender ball, and shake vigorously for 30 seconds. This will help break down any grease or grime that has built up inside the bottle.
Step 4: Scrub the Blender Bottle
Using a bottle brush, scrub the inside of the blender bottle, paying extra attention to the bottom and any crevices. Rinse thoroughly with warm water.
Step 5: Clean the Accessories
Use a smaller brush to clean the lid and straw thoroughly. Rinse with warm water and dry.
Step 6: Dry and Store the Blender Bottle
Shake the excess water out of the blender bottle and let it air dry. Once dry, reassemble the blender bottle, and store it in a cool, dry place until you’re ready to use it again.
These six simple steps will give you a sparkling clean blender bottle in no time!
Top Cleaning Hacks
- For tough stains, soak the blender bottle in a mixture of water and baking soda overnight.
- Use a toothbrush to scrub hard-to-reach areas, such as the threads on the lid.
- Add a teaspoon of white vinegar to your cleaning solution to help remove odors.
With these hacks, you can take your blender bottle cleaning game to the next level!
Removing Tough Stains from Blender Bottles
Blender bottles are prone to developing stubborn stains that can be tricky to remove. Fortunately, there are effective methods and tips that you can use to tackle even the toughest stains. Here are some of the best techniques:
1. Baking soda and vinegar
Mix equal parts of baking soda and vinegar in your blender bottle and let it sit for a few minutes. The mixture will create a fizzing reaction that breaks down the stain. Rinse the bottle thoroughly with water and repeat the process if the stain persists.
2. Lemon juice and salt
Cut a lemon in half and squeeze the juice into your blender bottle. Add a tablespoon of salt and use a sponge or brush to scrub the inside of the bottle. Rinse it thoroughly with water and repeat the process if necessary.
3. Dish soap and hot water
Add a few drops of dish soap to your blender bottle and fill it with hot water. Leave it to sit for a few minutes before shaking it vigorously. Rinse the bottle thoroughly with water and repeat the process if the stain remains.
Remember to always rinse your blender bottle thoroughly after cleaning it to ensure that no cleaning product residue remains.
Preventing Odors in Blender Bottles
A smelly blender bottle can be a major turn-off and can ruin your smoothie experience. But don’t worry, preventing odors is easy with a few simple cleaning tips and habits.
Use Hot Water

After each use, rinse your blender bottle with hot water. Hot water helps to remove any leftover proteins or fruits in your blender bottle that can cause bad odors. Rinse it thoroughly to make sure that all the residues have been removed.
Disassemble Your Blender Bottle
When cleaning your blender bottle, it is essential to disassemble the different parts, including the lid and blender ball. This allows you to clean all the crevices and ensure that there is no leftover residue.
Use Baking Soda
Baking soda is a fantastic odor remover. If your blender bottle has developed an unpleasant smell, sprinkle baking soda inside and add warm water. Shake the bottle and let it sit for 15-20 minutes before rinsing with hot water.
Store Your Blender Bottle Properly
Proper storage is crucial to prevent odors. Always leave the cap off and let your blender bottle air dry completely before storing it. Once it’s dry, store your blender bottle in a dry and airy place to prevent moisture buildup.
By following these easy tips, you can keep your blender bottle smelling fresh and clean all the time. A little effort goes a long way in ensuring your blender bottle remains in top-notch condition for longer.
Gathering the Right Cleaning Supplies
Before I start cleaning my blender bottle, I always make sure to have the right cleaning supplies on hand. Here are the essential cleaning products you’ll need:
- Hot Water: This is the perfect cleaning agent for your blender bottle. Hot water helps to eliminate bacteria and removes any leftover residue from the blender bottle.
- Dish Soap: A drop or two of dish soap goes a long way! Dish soap is tough on grime and grease while being gentle on your blender bottle.
- Baking Soda: This is a non-toxic and affordable cleaning agent that effectively removes tough stains and odors.
- Vinegar: Vinegar is a natural cleaning agent that works wonders on stubborn stains and odors. It also helps to disinfect your blender bottle.
- Cleaning Brush: A cleaning brush is excellent for scrubbing hard-to-reach places and removing stubborn stains.
With these cleaning supplies at your disposal, you’ll be ready to tackle any mess in your blender bottle.
Stay tuned for the next section, where I will provide you with a step-by-step guide to effectively cleaning your blender bottle.
Cleaning and Maintaining Blender Bottle Accessories
Cleaning your blender bottle accessories is just as important as cleaning the bottle itself. Neglecting them can be a breeding ground for bacteria and other harmful microorganisms. Here are some easy cleaning tips and methods:
Cleaning Lids
- Remove the rubber ring from the lid and wash it separately using soap and water.
- Wash the lid with warm soapy water or in the dishwasher.
- Rinse thoroughly and let it dry completely before reattaching the rubber ring.
Cleaning Straws
- If your blender bottle has a detachable straw, remove it and wash it with soap and water.
- If the straw is attached and can’t be removed, use a pipe cleaner or a brush to clean it.
- Rinse thoroughly with water and let it dry completely before reattaching it.
Cleaning Blender Balls
- Remove the blender ball from the bottle and wash it with soap and water.
- Rinse thoroughly and let it dry completely before reattaching it to the bottle.
By following these easy cleaning tips and methods, you can ensure that your blender bottle and its accessories stay clean and free from any bad odor or harmful bacteria.
Section 9: Troubleshooting Common Cleaning Issues
Cleaning blender bottles can sometimes be tricky, and you might encounter some common issues that can be frustrating. Here are some quick troubleshooting tips to help you overcome these issues:
Issue 1: Lingering Odors
If you notice that your blender bottle still has a lingering odor even after cleaning, try adding a teaspoon of baking soda to the bottle, fill it with water, and let it sit overnight. Rinse it out in the morning, and the odor should be gone.
Issue 2: Stains that Won’t Budge
If your blender bottle has stubborn stains that won’t come out, try mixing equal parts baking soda and water to form a paste. Apply the paste to the stained area and let it sit for at least 15 minutes before rinsing it out. For even tougher stains, try soaking the bottle in a mixture of vinegar and water overnight.
Issue 3: Mold Growth
If you notice mold growth in your blender bottle, do not use it until you have thoroughly cleaned it. Mix equal parts water and vinegar and let the bottle soak in the solution for at least an hour. Rinse it out thoroughly with warm water and allow it to dry completely before using it again.
Issue 4: Smelly Accessories
The accessories that come with your blender bottle, such as the lid and straw, can also develop odors. To clean them, disassemble the accessories and soak them in a mixture of warm water and soap. Scrub them with a soft-bristled brush and rinse them thoroughly before allowing them to dry completely.
Conclusion
So, there you have it! With these essential tips and techniques, you’ll be able to keep your blender bottle in optimal condition, free of germs and unpleasant odors. By cleaning your blender bottle regularly and properly, you’ll ensure its longevity and keep it ready for your next smoothie or protein shake.
Remember to gather the necessary cleaning supplies, follow our step-by-step guide, and use our top cleaning hacks to remove stubborn stains and eliminate odors. And don’t forget to properly dry and store your blender bottle after cleaning it.
Cleaning and maintaining the accessories that come with your blender bottle is also crucial for its overall cleanliness. By applying our easy cleaning tips, you’ll ensure that your blender bottle and its accessories stay in top shape.
If you encounter any issues during your cleaning journey, our troubleshooting section has got you covered with quick and effective solutions. And if you follow all these tips and techniques, your blender bottle will be spotless and ready for your next use.
Thank you for reading, and happy cleaning!
FAQ
Why is regular cleaning of blender bottles important?
Regular cleaning of blender bottles is crucial to maintain hygiene and prevent the buildup of bacteria. It ensures that your blender bottle remains safe for everyday use and keeps your drinks fresh and clean.
What cleaning supplies do I need to clean my blender bottle?
To clean your blender bottle effectively, gather the following supplies: warm water, dish soap, a cleaning brush with bristles, and baking soda. These essential cleaning products will make the cleaning process easier and more efficient.
How do I remove tough stains from my blender bottle?
To remove tough stains from your blender bottle, create a paste using baking soda and water, apply it to the stained area, and scrub gently with a cleaning brush. Rinse thoroughly, and the stains should be gone. Alternatively, you can use a mixture of vinegar and water to soak the bottle overnight and then scrub away the stains.
How can I prevent odors in my blender bottle?
To prevent odors in your blender bottle, ensure that you clean it thoroughly after every use. Use warm water and dish soap, paying extra attention to the lid and any accessories. Additionally, let your blender bottle air dry completely before storing it to prevent any moisture buildup that can lead to odors.
How should I dry and store my blender bottle?
After cleaning your blender bottle, make sure to dry it completely before storing. Place it upside down on a drying rack or towel to allow air circulation. Avoid using a towel to dry the bottle, as it can leave lint behind. Once dry, store your blender bottle in a clean, dry place away from direct sunlight.
How do I clean and maintain the accessories of my blender bottle?
To clean and maintain the accessories of your blender bottle, such as lids, straws, or blender balls, wash them with warm, soapy water after each use. Pay attention to any crevices or hard-to-reach areas. You can also consider using a small brush or pipe cleaner to clean the straws thoroughly. Rinse and let them air dry before storing.
What can I do if I encounter common cleaning issues?
If you encounter common cleaning issues, such as lingering odors or stubborn stains, try using a mixture of vinegar and water to soak the bottle overnight. You can also try scrubbing the stains with a paste made of baking soda and water. For any other issues, refer to the troubleshooting section in this article for quick and effective solutions.
Blender Bottle Accessories: Top 3 Parts and Shaker Add-Ons

In the realm of fitness and sports, the shaker bottle has become an indispensable item. From mixing protein shakes to keeping your drinks cold, a high-quality shaker bottle can be a game-changer.
But it’s not just about the bottle; the accessories that come with it can make all the difference. In this article, we’ll explore the best blender bottle accessories that you may need to elevate your gym experience.
From wire whisks to insulated stainless steel options, we’ve got you covered.
Why Choose Blender Bottle?
Blender Bottle is a brand that has become synonymous with quality and innovation in the shaker cup market. With patented wire whisk technology and a range of accessories, it’s no wonder customers choose BlenderBottle time and again. The brand offers a variety of options, from the classic shaker to more advanced models with various add-ons.
Must-Have Blender Accessories
Wire Whisk
The wire whisk is a patented part of many Blender Bottle products. It ensures a smooth mix every time you shake your bottle. It’s also easy to clean and is a standard item in most shaker bottles.
Insulated Stainless Steel
If you like your drinks cold, the insulated stainless steel bottles are a great option. They keep your drink cold for hours, even during long gym sessions.
Mixer Base
Some advanced models come with a mixer base that can blend more than just protein shakes. You can make smoothies, mix pancake batter, and more.
Where to Find and Buy
Online Shops
Online shopping offers the most extensive range of options. With standard shipping and even free delivery offers, it’s a convenient way to shop.
Sports Stores
You can also find a good selection of BlenderBottle products in sports stores. Experts in these shops can help you choose the best accessories for your needs.
Customer Reviews
Before making a purchase, it’s always a good idea to read customer reviews. They offer real-world insights into the product’s quality and usability.
Time and Convenience
One of the best parts about BlenderBottle and its accessories is the time you save. With quick and easy-to-use products, you can spend less time preparing your drinks and more time focusing on your fitness goals.
Additional Perks
Portability
BlenderBottle products are designed to go wherever you go. They are portable and fit easily into gym bags.
Quality
High-quality materials ensure that your bottle and its accessories will last a long time.
Variety
From colors to sizes, BlenderBottle offers a wide range of choices to suit every individual’s needs.
Conclusion
BlenderBottle has set the standard for what a shaker bottle should be. With its range of high-quality accessories, you’re sure to find the perfect add-ons to enhance your fitness journey. Whether you’re a gym expert or just starting, these accessories will make your life easier, more efficient, and perhaps even more enjoyable. So the next time you’re in the market for a new shaker bottle or accessories, make sure to consider what BlenderBottle has to offer. Thanks for reading, and here’s to a healthier you!
FAQ
What are Blender Bottle accessories?
Blender Bottle accessories are additional items that can be used with your Blender Bottle to enhance your blending experience. These accessories can include things like carrying loops, replacement parts, lids, shaker balls, straws, cleaning brushes, and storage solutions.
Why should I accessorize my Blender Bottle?
Accessorizing your Blender Bottle can provide added convenience, style, and functionality. Accessories like carrying loops make it easier to take your Blender Bottle on the go, replacement parts ensure the longevity of your bottle, and lids, shaker balls, straws, and cleaning brushes all contribute to a smoother blending experience. Storage solutions help keep your Blender Bottle organized and easily accessible.
Where can I find Blender Bottle accessories?
Blender Bottle accessories can be found on the official Blender Bottle website, as well as in select fitness stores and online retailers. It’s important to ensure that you are purchasing genuine Blender Bottle accessories to ensure compatibility and quality.
How do I clean Blender Bottle accessories?
Cleaning Blender Bottle accessories is easy. Most accessories can be washed with warm, soapy water or placed in the dishwasher for convenience. Cleaning brushes specifically designed for Blender Bottle accessories can also be used to ensure thorough cleaning.
Can I mix and match Blender Bottle accessories?
Yes, you can mix and match Blender Bottle accessories to create your personalized blending experience. Different lids, shaker balls, and straws can be used interchangeably to suit your preferences and the type of blend you are making.
Are Blender Bottle accessories compatible with all Blender Bottle models?
Blender Bottle accessories are designed to be compatible with most Blender Bottle models. However, it is always best to double-check the compatibility of specific accessories with your Blender Bottle model before purchasing.
How Shaker Blender Bottles Work as Protein Shaker Bottles?

Have you ever experienced a lumpy or unevenly mixed protein shake while using a shaker bottle? If so, you’re not alone. In fact, this problem is one of the reasons why Blender Bottles were created.
Blender Bottles, also known as protein shaker bottles, are designed to provide a smooth and well-blended mixture every time you use a blender bottle. But how does a blender bottle work? The science behind Blender Bottles lies in their unique technology and design.
Key Takeaways:
- Blender Bottles provide a smooth and well-blended protein shake every time
- The science behind how Blender Bottles work lies in their unique technology and design
How Blender Bottles Work
Understanding how Blender Bottles work is crucial for optimizing your mixing and blending experience. At first glance, they may appear to be just another water bottle, but beneath the surface, they’re engineered for superior mixing. Here’s how they work:
Basic Components
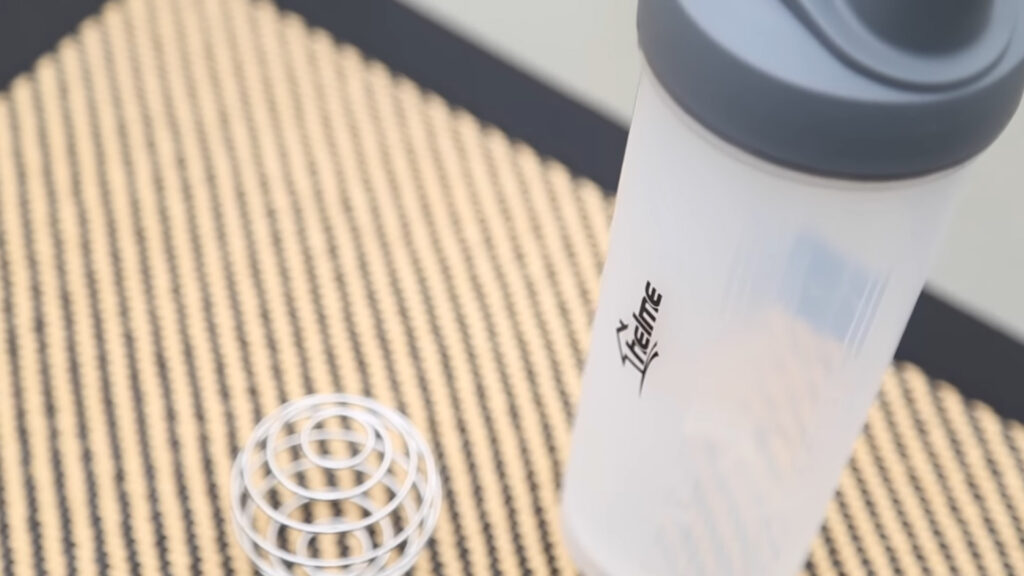
The basic components of a Blender Bottle are the bottle container, a screw-on or snap-on lid, and the signature BlenderBall® wire whisk.
- Bottle Container: Made usually from high-quality, BPA-free plastic like Eastman Tritan, the bottle container is designed to be both durable and safe for consumption.
- Lid: This part is engineered to seal tightly, ensuring that your drink doesn’t spill or leak. It often includes an ergonomic grip and sometimes even a flip cap for easy drinking.
- BlenderBall® Wire Whisk: This is the core element that sets Blender Bottles apart from conventional shaker bottles. This surgical-grade stainless steel ball is the key to the mixing mechanism.
The Process
- Ingredient Loading: Users typically pour liquids in first, followed by solid ingredients like protein powder or supplements. This sequence is essential for optimal mixing.
- Inserting the BlenderBall®: After adding the ingredients, the BlenderBall® wire whisk is dropped into the bottle.
- Securing the Lid: The lid is then screwed on tightly to ensure that the bottle is leak-proof.
- The Shake: When you shake the bottle, the BlenderBall® moves freely, cutting through the liquid and solid ingredients. Its motion is similar to that of a whisk, which disperses the solids into the liquid, effectively breaking down clumps.
The Science
- Centrifugal Force: Shaking the bottle initiates centrifugal force, causing the BlenderBall® to spin and create a vortex in the liquid. This process rapidly mixes the contents.
- Fluid Dynamics: As you shake, the fluid’s motion further contributes to a thorough mixing, ensuring even distribution and consistency.
- Gravity: The BlenderBall®’s weight helps it stay in constant motion during the shake, preventing it from floating and ensuring a smooth blend.
The patented BlenderBall® wire whisk is the magic behind the Blender Bottle’s efficiency. It’s designed to mix the toughest ingredients with ease, making for a smooth, lump-free shake. The result is a perfectly mixed drink, every time.
Understanding Blender Bottle Technology
Blender Bottles, the ultimate water bottle and shaker cup solution for protein shakes and supplements, come packed with innovative features. These bottles are designed to deliver a well-blended mixture that tastes great and is easy on the stomach. Below are some of the key features that make Blender Bottles a popular choice amongst fitness enthusiasts:
Ergonomic/Gripper Lid
The Blender Bottle features a unique design that includes an ergonomic lid with a secure grip. The lid firmly seals the bottle, preventing any spills or leaks while shaking your drink inside the bottle. The gripper makes it easier for users to hold the shaker cup and shake their drinks without experiencing any slippage.
The BlenderBall® Wire Whisk
The BlenderBall® wire whisk is an advanced mixing mechanism that ensures a smooth consistency for all your drinks. This whisk ball is made of high-quality surgical-grade stainless steel that is rust and odor-resistant, making it easy to clean.
Patented Mixing System
The Blender Bottle also features a patented mixing system that uses the BlenderBall® whisk ball to move freely inside the bottle as you shake it. This system ensures every ingredient, such as protein powder, is fully mixed, leaving no clumps or residue.
The Mixing Mechanism in blender bottles
Blender Bottles are known for their exceptional mixing capabilities, which are achieved through their unique mixing mechanism. This whisk ball is strategically placed inside the water bottle container. It is designed to create a vortex-like effect as the shaker bottle is shaken, ensuring that all ingredients are evenly mixed.
The Science Behind Blender Bottle Mixing Action
The mixing action of Blender Bottles is achieved through a combination of centrifugal force and fluid dynamics. As the shaker bottle is shaken, the whisk ball creates a centrifugal force that drives the liquid and protein powder to the sides of the bottle. At the same time, the fluid dynamics of the liquid cause it to move in a circular motion around the whisk ball.
Benefits of Blender Bottle Mixing Mechanism
The mixing mechanism used in Blender Bottles offers several benefits over traditional shaker methods. It ensures all ingredients, like protein powder, are evenly distributed throughout the protein shake. Plus, it’s easy to clean.
The Design of Blender Bottles
Blender Bottles are designed with functionality and durability in mind. They’re made from high-quality materials that are BPA and phthalate-free, ensuring they are safe for everyday use. The bottles are made from Eastman Tritan plastic, which is odor and stain-resistant, easy to clean, and can withstand high impact without warping or cracking.
How to Use a Shaker Bottle
Shaker bottles have become an essential tool for fitness enthusiasts, athletes, and health-conscious individuals who frequently consume protein shakes and other powdered supplements.
Using a shaker bottle may seem straightforward, but there are certain steps and tips to ensure you get the smoothest and most delicious protein shake possible. Here’s how to use a shaker bottle effectively:
Step 1: Choose the Right Shaker Bottle
First, make sure you’re using a shaker bottle that meets your needs. There are various types, some with compartments for storing extra protein powder or other supplements. Many users prefer Blender Bottles because of their patented whisk ball and leak-proof design.
Step 2: Add Liquid First
Before adding your protein powder or other supplements, start by adding liquid into the shaker bottle. Whether you prefer water, milk, or juice, filling up to one-third or half of the bottle ensures better mixing. This liquid acts as a barrier that prevents the powder from sticking to the bottom.
Step 3: Measure the Protein Powder
Use a scoop or a measuring cup to add the correct amount of protein powder to the water bottle. This usually depends on the manufacturer’s guidelines and your dietary needs.
Step 4: Add the Whisk Ball
Insert the whisk ball into the shaker bottle. In a Blender Bottle, this is typically a BlenderBall® wire whisk, made from surgical-grade stainless steel. This ball helps in breaking up clumps of powder and ensures a smoother shake.
Step 5: Secure the Lid
Close the lid tightly, ensuring it is properly aligned with the spout. A securely fastened lid prevents leaks and spills while you’re shaking the bottle.
Step 6: Shake It Up
Now, it’s time for the fun part! Shake the bottle vigorously for about 30 seconds. Use both hands for stability — one on the lid and the other supporting the bottom of the bottle. Shake it up and down, side-to-side, and in a circular motion for the most effective blending.
Step 7: Check and Enjoy
Before opening the lid, give your shaker bottle a quick inspection to ensure all the powder has fully dissolved. If you still see clumps, continue shaking until the consistency is smooth. Once you’re satisfied, open the lid and enjoy your perfectly mixed protein shake.
Step 8: Cleaning
Shaker bottles are generally easy to clean, especially if they are made from materials like Eastman Tritan plastic, which is stain and odor-resistant. After consuming your protein shake, rinse the bottle with warm water. For deep cleaning, you can use a mild soap and a bottle brush to scrub the interior, whisk ball, and lid.
By following these steps, you can ensure that you use a shaker bottle to its maximum potential, making every protein shake a perfectly blended and enjoyable experience.
How to Use a Blender Bottle for Protein Shakes
Here are some tips for achieving the best results with your protein shaker bottle:
- Start by adding liquid to the bottle first, filling it about a third of the way.
- Add the protein powder or other ingredients next.
- Insert the whisk ball.
- Securely screw on the lid.
- Shake vigorously for about 30 seconds.
Remember that proper use and technique are key to achieving the best results when you use a Blender Bottle.
The Benefits of Blender Bottle Innovation
The unique features of Blender Bottles make them a popular choice among athletes, fitness enthusiasts, and health-conscious individuals. They are durable, versatile, and easy to clean, providing a convenient way to mix and drink your protein shakes.
Maintaining and Cleaning Blender Bottles
As with any water bottle or shaker cup, proper maintenance will ensure your Blender Bottle is easy to clean and lasts for a long time. Here are some guidelines to follow:
- Rinse your Blender Bottle with hot water immediately after use.
- When washing, use a mild soap or detergent and warm water.
Conclusion
To summarize, Blender Bottles have become a staple in the world of fitness and health, and for a good reason. Their innovative design and technology make them more than just a water bottle or shaker cup; they are a complete solution for anyone looking to simplify their protein shake routine. Whether you’re blending protein supplements, smoothies, or any other drink, Blender Bottles provide a superior and convenient option that’s also easy to clean.
FAQ
How do Blender Bottles work?
Blender Bottles work by utilizing a mixing mechanism that ensures a smooth and well-blended mixture. The design and technology of Blender Bottles prevent clumps and uneven distribution of ingredients.
What technology is used in Blender Bottles?
Blender Bottles incorporate various features and innovations to enhance functionality and ease of use. These technologies contribute to the effective mixing and blending of ingredients.
How does the mixing mechanism in Blender Bottles work?
The mixing mechanism in Blender Bottles creates a smooth and well-blended mixture by efficiently breaking down clumps and ensuring consistent distribution of ingredients. This results in a superior mixing experience.
What is the design of Blender Bottles like?
Blender Bottles are designed with ergonomics and functionality in mind. They feature an ergonomic shape and are made from durable materials. The design aspects contribute to the effectiveness and durability of Blender Bottles.
How do shake cups, specifically Blender Bottles, blend ingredients?
Shake cups like Blender Bottles effectively blend ingredients by utilizing their unique design and mixing mechanism. There are proper techniques and tips that can be followed to achieve the best blending results.
What are the benefits of Blender Bottle innovation?
The innovative features found in Blender Bottles provide various benefits, making them stand out in the market. These features contribute to a superior mixing experience and enhance the overall functionality of Blender Bottles.
How do Blender Bottles function as protein shakers?
Blender Bottles are specifically designed to function as protein shakers. They enhance the mixing of protein powders and other supplements, ensuring a smooth and consistent drink without any clumps.
How should I maintain and clean Blender Bottles?
It is important to properly maintain and clean Blender Bottles to ensure their longevity and hygiene. There are tips and guidelines available to help keep them in optimal condition.
Different Types of Blender Bottles | Bottle Type

As a fitness enthusiast, I know the importance of having the right equipment to support my goals. One essential piece of equipment that I use daily is a blender bottle. These bottles are designed to help me mix my protein shakes and supplements with ease.
However, not all blender bottles are created equal. It’s important to understand the different types of blender bottles and how they are made. The materials used in construction can have a significant impact on the performance and durability of the bottle.
in this article we will learn that what are the types of blender bottles. so lets get started.
Plastic Blender Bottles
When it comes to blender bottles, plastic models are a popular choice due to their affordability and versatility. Typically made from BPA-free, food-grade plastic, these bottles are lightweight and durable.

Plastic blender bottles come in various styles, including shaker cups, bottles with storage compartments, and custom designs. They’re also easy to clean and are often dishwasher safe.
If you’re on a budget or looking for a simple option, a plastic blender bottle may be the way to go.
The Impact of Materials: Understanding the Different Types of Blender Bottles
When it comes to choosing a blender bottle, the material can make a significant impact on the overall performance and durability. In this section, I’ll be discussing stainless steel blender bottles, which are highly durable and maintain temperature well.
Stainless Steel Blender Bottles
Stainless steel blender bottles are a popular choice for those seeking durability and temperature control. These bottles are resistant to dents and scratches and provide excellent insulation properties, keeping drinks hot or cold for longer periods. The double-wall insulation in stainless steel bottles ensures that the temperature is maintained for several hours.
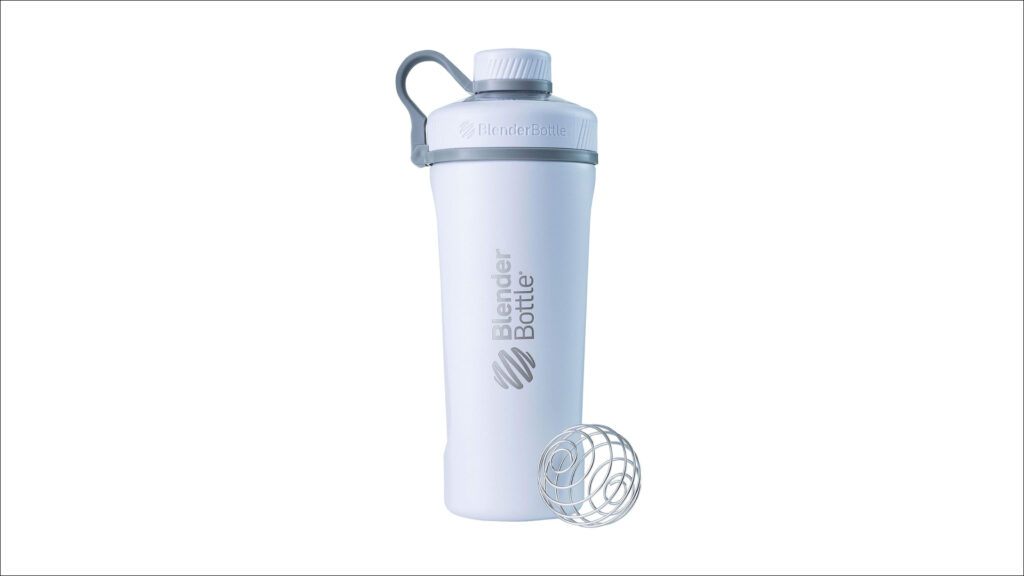
One of the significant advantages of stainless steel blender bottles is their easy cleaning and odor resistance. They are often dishwasher safe and don’t retain odors, providing a fresh taste experience every time. Stainless steel bottles are also relatively lightweight, making them an ideal choice for those who carry their bottles while on the go.
However, stainless steel blender bottles typically have a higher price point than their plastic counterparts. Additionally, they are not transparent, so it’s challenging to see the contents of the bottle and measure the liquid accurately.
In summary, if you prioritize durability and temperature control, a stainless steel blender bottle may be the best choice for you. With their superior insulation properties and resistance to dents and scratches, they are ideal for those looking for a long-lasting blender bottle.
Glass Blender Bottles
Glass blender bottles offer a unique advantage over plastic and stainless steel bottles: superior taste. Glass does not leach any flavors or odors into the beverages, ensuring that your drink tastes pure and fresh. They are also environmentally friendly, as glass is a recyclable material that does not contain harmful chemicals like BPA.

Glass blender bottles are highly durable and resistant to scratches and stains. They are easy to clean and maintain, and they do not retain odors or flavors from previous drinks. Glass bottles come in various sizes and designs, from classic to more modern and sleek options. They are also perfect for individuals who prioritize the purity of their drinks.
Blender Bottles with Mixer Ball
If you’re looking to achieve a smooth, consistent blend for your protein shakes or powdered supplements, consider investing in a blender bottle with a mixer ball. The metal whisk ball inside the bottle helps to break up clumps and mix ingredients thoroughly, resulting in a more enjoyable drinking experience.
The mixer ball is easy to use and can be cleaned alongside the bottle. It also ensures that all ingredients are evenly distributed throughout the drink, making it an efficient choice for those who are always on the go. Whether you’re headed to the gym or simply need a quick protein boost, a blender bottle with a mixer ball can help you achieve your fitness goals with ease.
Blender Bottles with Storage Compartments
Blender bottles with storage compartments are perfect for people on the go like me. Often, I have to pack my protein powders, supplements, or snacks separately, and it can be a hassle. With a blender bottle that has storage compartments, I can keep everything I need in one place.
These bottles are available in various sizes and styles, and the separate compartment is usually attached to the bottom or top of the bottle. The compartment can be used for dry ingredients or even a separate drink.
I find these bottles very convenient when traveling because I do not have to carry multiple containers. They are also great for outdoor activities like hiking or camping when you need to keep your snacks and drinks separate.
Understanding the Different Types of Blender Bottles
When it comes to blender bottles, one of the most important considerations is the material it’s made from. In this section, we’ll explore insulated blender bottles and their unique advantages.
Insulated Blender Bottles
Insulated blender bottles are designed to keep your drinks at the desired temperature for longer periods. The bottles are typically made with double-wall insulation, which maintains the temperature of your drink, whether cold or hot. These bottles are ideal for individuals who want to enjoy their drinks at the desired temperature, whether at the gym or on the go.
Insulated blender bottles are a popular choice for those who prioritize temperature control. They are perfect for keeping your drinks cold during hot summer days or keeping your coffee hot during cold winter mornings. The double-wall insulation ensures that your beverage stays at the desired temperature for hours.
In addition to temperature control, insulated blender bottles are typically durable and built to last. They are often made from high-quality materials like stainless steel, which offers excellent insulation properties and durability. Insulated blender bottles are perfect for those who want a reliable and long-lasting blender bottle.
If you’re someone who values temperature control and durability, then an insulated blender bottle is a perfect choice for you. With its double-wall insulation and high-quality materials, you can enjoy your drinks at the desired temperature for hours, no matter where you are.
Custom Blender Bottles
If you’re looking to add a personal touch to your fitness routine, custom blender bottles are the way to go! With these bottles, you can create your own designs, add logos, or include motivational quotes to keep you motivated during workouts.
Custom blender bottles are not only great for personal use, but they also make fantastic promotional items for businesses. By adding your logo or message on the bottle, you’re not only getting your brand out there, but also providing your customers with a handy and practical item they’ll use daily.
Blender Bottle Accessories
As a fitness enthusiast, I know how important it is to have the right accessories to support my routines. Blender bottle accessories can take your blending experience to the next level. Here are some great options to consider:
- Interchangeable Lids: Switching out lids can provide versatility to your blender bottle. Look for a lid with a snap closure or a flip cap to avoid spills.
- Carrying Loops: Carrying loops make it easy to transport your blender bottle, especially during outdoor activities or commutes. Choose a sturdy carrying loop to ensure it doesn’t break or come loose.
- Storage Containers: If you need to bring along supplements or snacks, a storage container that attaches to your blender bottle is a great option. Some storage containers are also insulated, keeping your items cool or warm.
- Additional Mixer Balls: Mixer balls are crucial for ensuring a smooth blend of your ingredients. Having an additional mixer ball on hand can make your blending process even more efficient.
Consider which accessories will benefit you most in your daily routine. With the right blender bottle accessories, your blending process can be more convenient and efficient, ensuring you get the most out of your fitness journey.
Blender Bottle Sizes
When it comes to blender bottles, size matters. The right size depends on your needs, preferences, and activities. Here are the most common blender bottle sizes:
- 20 oz: This size is perfect for carrying a single serving of your favorite shake or drink. It’s compact and easy to bring along during your commute or workout.
- 28 oz: A slightly bigger option, this size is ideal for those who want a larger drink portion. It’s still portable, but may require a bigger bag or container to bring along.
- 32 oz: The largest option available, this size is great for those who need to carry a lot of liquid. It’s perfect for long workouts or outdoor activities, but may not fit in smaller bags or cup holders.
Consider your daily routine and drinking habits to choose the best size for you. Do you prefer to have a larger drink during your workout or do you only need a small portion? Do you require a container that’s easy to bring along or are you willing to carry a larger bottle for more convenience?
Choosing the Best Blender Bottle for Protein Shakes
As someone who regularly makes protein shakes, finding the right blender bottle can make all the difference in the taste and consistency of my drink. Here are some factors to consider when choosing the best blender bottle for protein shakes:
A Secure Lid
A blender bottle with a secure lid is crucial, especially if you plan to take your shake on the go. Look for bottles with screw-on or snap-on lids that won’t leak or spill. A reliable lid ensures that your shake stays in the bottle and not all over your bag or car.
An Efficient Mixing Mechanism
The mixing mechanism in the bottle is important to ensure that your protein powder blends thoroughly. Blender bottles with a built-in mixer ball or mesh sieve are effective in breaking up clumps and creating a smooth consistency. Some bottles even come with battery-powered mixers for extra efficiency.
Easy Cleaning
Cleaning your blender bottle shouldn’t be a hassle. Look for bottles that are dishwasher safe or easy to clean by hand. Bottles with wide mouths make it easier to reach all parts of the bottle, ensuring a quick and thorough clean.
Specific Size
The size of your blender bottle depends on your protein shake volume needs and portability requirements. If you plan to take your shake on the go, a smaller size like 20 oz might be best. For larger shakes or at-home use, consider a 28 oz or 32 oz bottle. Make sure the bottle is the right size for your preferred protein shake recipe.
Add-Ons
If you want to customize your blender bottle, look for bottles with additional features like storage compartments, carrying loops, or interchangeable lids. Storage compartments let you carry dry supplements or snacks in the same bottle as your shake, while carrying loops make the bottle easy to transport. Interchangeable lids let you switch up the style of your bottle to fit your look or activity.
By considering these factors, you can find the best blender bottle for your protein shakes. A reliable and efficient blender bottle can save you time and effort, while also ensuring that your shakes are consistently delicious and healthy.
Conclusion
After exploring the different types of blender bottles, I hope you now have a better understanding of what to look for when choosing the best blender bottle for your needs. With options ranging from plastic, stainless steel, and glass bottles to additional features like mixer balls, storage compartments, and insulation, there is a blender bottle out there for everyone.
Consider Your Priorities
When making your selection, think about your priorities. Do you need a bottle that is durable and resistant to dents and scratches? Are you someone who prioritizes the taste of your drinks and wants to avoid any leaching of flavors or odors? Or perhaps you value convenience and need a blender bottle with a storage compartment for your supplements and snacks?
Think About Your Routine
Additionally, consider your daily routine and lifestyle. Do you need a blender bottle that can keep your drinks hot or cold for an extended period? Or maybe you need a specific size to fit in your gym bag or cup holder?
Choose the Best Blender Bottle for Your Protein Shakes
For those who are looking for a blender bottle specifically for protein shakes, remember to look for a secure lid, an efficient mixing mechanism, and easy cleaning. Consider whether you need a mixer ball, a storage compartment, or a certain size for your protein shake preparation needs.
By taking these factors into account, you can find the perfect blender bottle that suits your needs and helps you stay on track with your fitness goals. Whether you’re on-the-go, at the gym, or at home, a high-quality blender bottle is a must-have accessory for any fitness enthusiast.
FAQ
What are the different types of blender bottles?
The different types of blender bottles include plastic, stainless steel, and glass bottles. Each type offers unique advantages and features to cater to different needs and preferences.
What materials are blender bottles made from?
Blender bottles are typically made from BPA-free, food-grade plastic, stainless steel, or glass. These materials are chosen for their durability, safety, and performance.
Are blender bottles easy to clean?
Yes, blender bottles are designed to be easy to clean. Most bottles are dishwasher safe, and you can also hand wash them with warm, soapy water. Cleaning instructions may vary depending on the specific bottle material, so it’s always a good idea to refer to the manufacturer’s guidelines.
Can I use blender bottles for hot beverages?
It depends on the specific bottle material. Plastic blender bottles are not suitable for hot beverages as they can warp or melt. Stainless steel and glass blender bottles, on the other hand, are excellent for hot beverages and can help maintain the desired temperature for longer periods.
Are blender bottles leak-proof?
Many blender bottles are designed with leak-proof lids or closures to prevent spills and leaks. However, it’s important to properly secure the lid to ensure leak-proof performance. Always check the manufacturer’s instructions for specific usage guidelines.
Can I use blender bottles for purposes other than blending drinks?
Yes, blender bottles can be versatile and used for purposes other than blending drinks. Some bottles come with storage compartments for protein powders, supplements, or snacks. Others can be customized for promotional purposes, making them a useful accessory for businesses or personalization enthusiasts.
What sizes do blender bottles come in?
Blender bottles are available in various sizes, typically ranging from 20 oz to 32 oz. The size you choose depends on your preferred drink volume and portability requirements. Consider your daily routine and desired use to select the best blender bottle size for your needs.
How can I choose the best blender bottle for protein shakes?
When choosing a blender bottle for protein shakes, consider factors such as a secure lid, an efficient mixing mechanism (such as a mixer ball), and ease of cleaning. Additionally, think about any specific needs you have, such as a storage compartment for protein powder or a specific size that accommodates your protein shake volume.
What accessories are available for blender bottles?
Various accessories are available for blender bottles, including interchangeable lids, carrying loops, storage containers, and additional mixer balls. These accessories can enhance the functionality and convenience of your blender bottle and cater to your specific needs.
How do I maintain and care for my blender bottle?
To maintain and care for your blender bottle, it’s recommended to clean it thoroughly after each use. Follow the manufacturer’s cleaning instructions, which usually involve hand washing with warm, soapy water or placing the bottle in the dishwasher if it’s dishwasher safe. Additionally, ensure the bottle is completely dry before storing it to prevent any odors or mold growth.