Water bottles, especially the popular Hydro Flask, are more than just a hydration tool. They’re a statement of your personality, a canvas for your creativity.
In a world where individuality is celebrated, having a custom water bottle is a great way to stand out from the crowd.
This DIY guide will show you how to decorate your water bottle with custom vinyl stickers, transforming it into a unique, one-of-a-kind accessory that not only serves a functional purpose but also reflects your personal style.
Why Choose Vinyl Stickers for Your Water Bottle
Vinyl stickers are a great way to personalize your water bottle. They’re durable, waterproof, and dishwasher safe, ensuring they’ll last a long time. Plus, with the ability to create custom designs, the possibilities are endless.
Whether you’re looking to add your name, a logo, or a stylish design, vinyl decals are the perfect solution. They adhere well to different surfaces, including metal, plastic, and glass, making them versatile for any type of water bottle. Moreover, they come in a variety of colors and finishes, from glossy to matte, allowing you to achieve the look you desire.
Materials Needed for DIY Water Bottle Stickers
To start your DIY project, you’ll need a few materials:
- Vinyl sticker material: This is the base for your custom sticker. It’s durable, waterproof, and comes in a variety of colors. You can choose from a wide range of options, depending on the look you’re going for.
- Adhesive: A strong adhesive ensures your sticker will stay on your bottle, even through washes. There are different types of adhesives available, but it’s important to choose one that’s waterproof and resistant to heat to ensure the longevity of your sticker.
- Cutting machine or scissors: A cutting machine like a Cricut can make precise cuts, but scissors work too. If you’re using scissors, make sure they’re sharp for clean, precise cuts.
- Design software: Adobe Illustrator, Silhouette Studio, or Cricut Design Space can be used to create your design. These programs allow you to design your sticker to the exact dimensions of your water bottle, ensuring a perfect fit.
You can find these materials on Etsy or other craft stores. Remember, investing in high-quality materials will result in a better end product.
Step-by-Step Guide to Decorating Your Water Bottle with Vinyl Stickers
- Design Your Sticker: Use your design software to create your custom design. This could be your name, a logo, or anything else you want on your water bottle. Make sure to save your design with a white background for best results.
- Print Your Sticker: Using a high-quality inkjet or laser printer, print your design onto the vinyl sticker material. Ensure the print quality is high to get a durable, long-lasting sticker.
- Cut Out Your Sticker: Use your cutting machine or scissors to cut out your sticker. Be careful to make precise cuts for a professional look.
- Apply Your Sticker: Clean your water bottle with soap and water, then dry it with a paper towel. Peel the backing off your sticker, then carefully apply it to your bottle. Use a ruler to smooth out any air bubbles.
- Seal Your Sticker: To make your sticker even more durable and waterproof, consider adding a layer of clear vinyl over it. This will protect the ink and keep your sticker looking great.
How to Create Custom Water Bottle Stickers with Cricut
Cricut is a cutting machine that’s perfect for DIY projects like this. It’s super easy to use and can make precise cuts, even for complex designs. Plus, with Cricut Design Space, you can create your design right in the software. Here’s how to use it:
- Design Your Sticker in Cricut Design Space: Start by opening Cricut Design Space and creating a new project. Upload your design, or use the built-in tools to create one from scratch. You can add text, shapes, and even images.
- Prepare Your Sticker for Cutting: Once your design is ready, you’ll need to prepare it for cutting. This involves resizing the design to fit your water bottle and selecting the type of material you’re cutting (in this case, vinyl).
- Cut Your Sticker: Load your vinyl into the Cricut machine and follow the prompts to start the cutting process. The Cricut will precisely cut your design, creating a professional-looking sticker.
- Weed Your Sticker: After cutting, you’ll need to “weed” your sticker, or remove the excess vinyl around your design. This leaves only your design on the backing material.
- Transfer Your Sticker: Apply transfer tape to your sticker, then carefully peel it off the backing material. This will leave your sticker on the transfer tape, ready to be applied to your water bottle.
How to Decorate Different Types of Bottles
This guide focuses on decorating a Hydro Flask, but you can use these steps to decorate any type of water bottle. Whether you’re using a plastic bottle, a metal bottle, or another type of water bottle, custom stickers are a great way to personalize it. Just make sure to clean the bottle first to ensure the sticker adheres properly. Here are some tips for decorating different types of bottles:
- Plastic Bottles: Make sure the surface is smooth and free of any texture, as this can interfere with the adhesion of the sticker. Also, avoid applying stickers to areas that will be frequently handled, as this can cause the sticker to peel off over time.
- Metal Bottles: These are ideal for vinyl stickers, as the smooth, hard surface allows for excellent adhesion. Just make sure the bottle is clean and dry before applying the sticker.
- Glass Bottles: Like metal bottles, glass bottles provide a smooth surface for sticker adhesion. However, be careful when handling the bottle, as glass can be slippery when wet.
Decorating your water bottle with custom vinyl stickers is a fun and easy DIY project. It’s a great way to show off your personality and make your bottle stand out from the rest. So why not give it a try? Create your custom water bottle today and hydrate in style!
Are Blender Bottles Microwave Safe?

Blender bottles are popular tools for mixing and shaking drinks and supplements, but with their increasing use, people are beginning to wonder whether they are safe to use in the microwave. In this article, we’ll take a look at the safety of using blender bottles in the microwave, check Are Blender Bottles Microwave Safe? and what to consider before using one in this way.
Don’t microwave your Blender Bottle, The pressure can cause the lid to pop off and create a mess. It’s made of safe, BPA– and Phthalate-free plastic, but it’s not meant for the microwave.
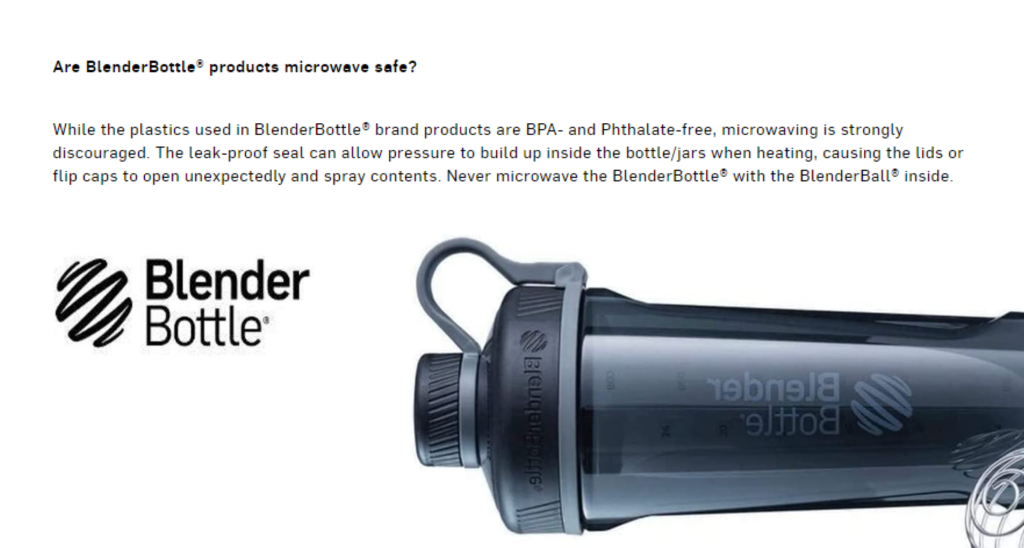
Source: www.blenderbottle.com
Materials Used in Blender Bottles
Most blender bottles are made of plastic or a combination of plastic and other materials. Some bottles may also have metal components, such as the wire ball used for mixing. These materials can play a role in determining the safety of using a blender bottle in the microwave.
Microwaving Plastic Bottles
Plastic is generally considered safe for use in the microwave, but it is important to make sure the plastic used in the blender bottle is microwave safe. Some plastic materials can release harmful chemicals into food and drinks when exposed to heat, so it’s important to check the manufacturer’s guidelines or look for microwave safe labels on the bottle.
Microwaving Bottles with Metal Components
Metal components in blender bottles can be a safety hazard in the microwave. Metal can cause sparks and even fires, so it’s important to avoid using bottles with metal components in the microwave. If your bottle has a metal component, it is best to transfer your drink to a microwave-safe container before heating it in the microwave.
FAQ About Blender Bottles
Can You Put Peanut Butter in a Blender Bottle?
Yes, you can put peanut butter in a blender bottle. However, it may be a bit more difficult to mix and may require more effort than using a traditional blender or food processor, we would highly recommend reading this article to understand: How to put peanut butter in Blender Bottle
Why do blender bottles smell
Blender bottles can sometimes develop an unpleasant odor due to a buildup of bacteria, mold, or other residues inside the bottle. This can happen if the bottle is not cleaned regularly or if it is used to hold liquids that can cause staining or buildup, such as protein shakes or sports drinks. To prevent this from happening, it’s important to clean your blender bottle thoroughly after each use and to avoid storing liquids inside it for extended periods of time. Additionally, some bottles may have a strong odor when new, which will usually fade over time with regular use and cleaning.
Can I put a protein shaker in the microwave?
Might be, I am not sure about this because, some blender bottles are microwaveable, but it depends on the materials used in the bottle. Some bottles may have plastic components that are safe to use in the microwave, while others may have metal components that can cause hazards. It’s always best to check the manufacturer’s guidelines or look for microwave-safe labels on the bottle before using it in the microwave. If your bottle has metal components, it’s best to transfer your drink to a microwave safe container before heating it in the microwave.
In conclusion, not all blender bottles are microwave safe. Before using a blender bottle in the microwave, it’s important to check the materials used in the bottle and look for microwave safe labels or guidelines from the manufacturer. If your bottle has metal components, it’s best to transfer your drink to a microwave safe container before heating it in the microwave.
Can You Put 1 Soup of Peanut Butter in a Blender Bottle?

Introduction
Peanut butter is a popular ingredient in many healthy and delicious smoothies and shakes. But, Can You Put Peanut Butter in a Blender Bottle?
In this article, we will explore the answer to this question and provide some tips and tricks for successfully blending peanut butter in a blender bottle.
Yes, you can put peanut butter in a blender bottle. Why? Well, there are many reasons why this may be helpful.
For example, if you have no other storage for the peanut butter and would like to use it with your shake. Or maybe you need extra calories during a workout.
Why Put Peanut Butter in a Blender Bottle?
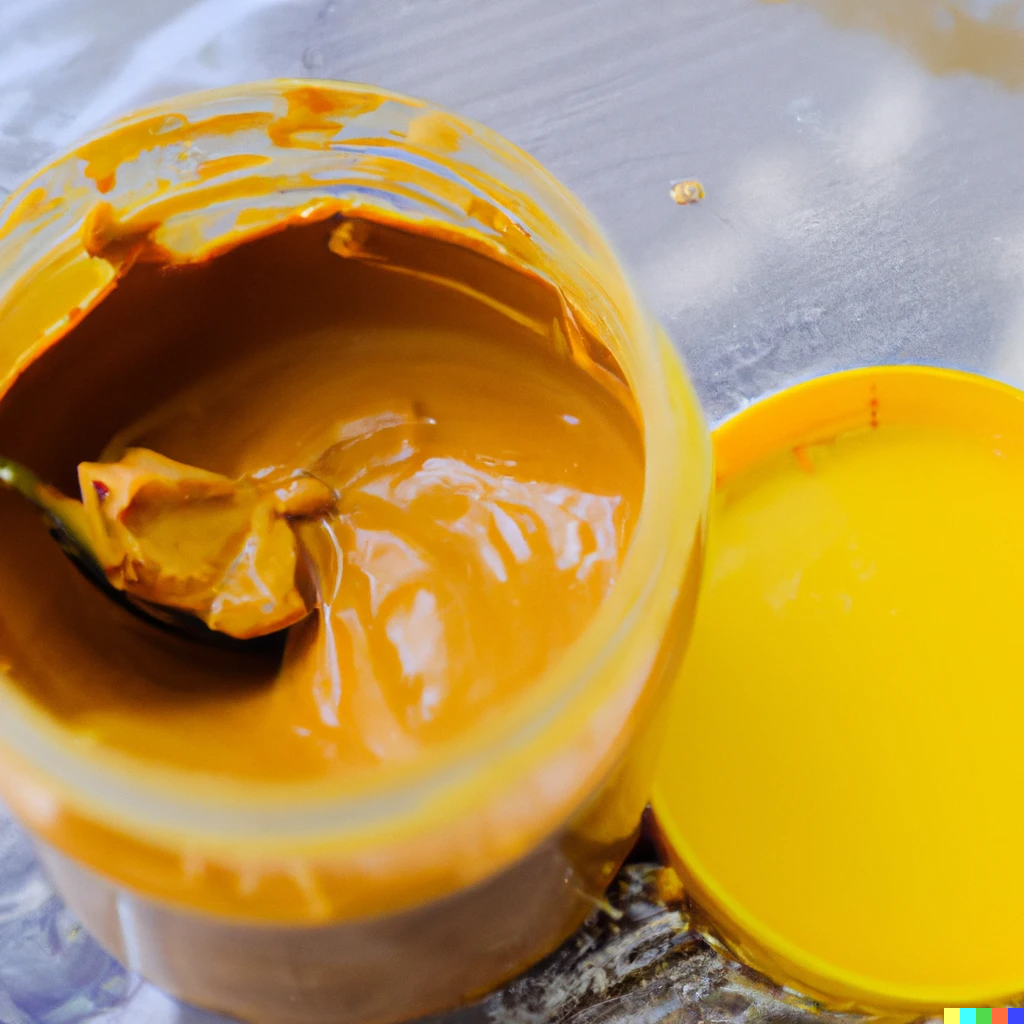
There are several reasons why someone may want to put peanut butter in a blender bottle.
Peanut butter is a great source of protein and healthy fats, making it an ideal ingredient in a post-workout shake or smoothie. Additionally, peanut butter can add a creamy texture and delicious flavor to any drink, making it a popular addition to many recipes.
Factors to Consider
When considering putting peanut butter in a blender bottle, there are a few factors to keep in mind.
The consistency of the peanut butter, the size and power of your blender bottle, and the other ingredients you are using can all impact the success of your blend.
It’s important to consider these factors and make any necessary adjustments to ensure a smooth and delicious blend.
Tips and Tricks
- Use creamy peanut butter for easier blending
- Add a small amount of liquid, such as milk or water, to help with blending
- Blend on high speed for 30 seconds or until desired consistency is achieved
- Stir the contents of the blender bottle with a spatula if necessary
Conclusion
In conclusion, peanut butter can be added to a blender bottle, but it’s important to consider the consistency of the peanut butter, the size and power of your blender bottle, and the other ingredients you are using. With the right tips and tricks, you can successfully blend peanut butter into a blender bottle to create a delicious and nutritious drink. So,
Go ahead and add some peanut butter to your next blender bottle creation!
How Many Ounces Fit in a Small Blender Bottle?

When it comes to using a blender bottle, making sure you directly measure the liquids is crucial. Whether it’s a smoothie, protein shake, or any other drink, having the right component rates is important for getting the asked taste and thickness. That is why knowing the size of your blender bottle and how numerous ounces it can hold is important. In this post, we’ll dive into the different aspects of blender bottle size and capacity.

We will answer questions like” How important can a small blender bottle hold?” and” What makes a blender bottle accessible to use?” By the end, you will have a better understanding of blender bottles and be suitable to pick one that works stylish for you. So, if you are eager to learn further about blender bottles and their capacities, keep reading!
What are the Different sizes of blender bottles available?
Different sizes of blender bottles are available
- Blender bottles come in a variety of sizes to accommodate different amounts of liquid or powder.
- Some common sizes include 20 oz, 28 oz, and 32 oz.
- The size you choose will depend on your personal needs and the type of blender bottle you have.
Small blender bottle capacity
- Small blender bottles, typically 20 oz, are designed for those who want a compact, lightweight option.
- These bottles are perfect for single servings of your favorite drinks or for those who are short on space.
Importance of knowing the capacity of your blender bottle
Knowing the capacity of your blender bottle is important for a few reasons:
- Proper measurement: Having an accurate measurement of the capacity of your bottle will help you mix the correct ratios of liquid and powder.
- Convenience: Knowing the capacity of your bottle will help you avoid overfilling or underfilling it, making your blending experience more convenient.
- Portion control: If you’re using your blender bottle for portion control or tracking your food intake, having an accurate measurement of the capacity is crucial.
Read about: Best 5 Water Bottles for College Students
How many ounces is a standard blender bottle
Understanding the ounces in a standard blender bottle is essential for a successful and enjoyable blending experience. Whether you’re mixing up a pre-workout shake or just a simple smoothie, knowing the capacity of your blender bottle and measuring ounces accurately is key.

Explanation of ounces
- Ounces, abbreviated as oz, are a unit of measurement used to express the volume of a liquid.
- It’s a standard unit of measurement in the United States and is widely used in the culinary and food industry.
- Understanding ounces is important for measuring liquids accurately, especially when using a blender bottle.
How many ounces are in a small blender bottle
- Small blender bottles typically hold 20 ounces of liquid.
- This is a convenient size for those who want a compact, lightweight option for their blending needs.
- 20 ounces is equivalent to 591 milliliters.
What is the Importance of measuring ounces accurately
- Measuring ounces accurately is crucial when using a blender bottle.
- Accurate measurement ensures that you have the right ratios of liquid and powder in your blender bottle.
- It also helps you `avoid overfilling or underfilling your blender bottle, making your blending experience smoother and more convenient.
What are the Travel-Friendly Blender Bottle Ounces
Travel-friendly blender bottles are specially designed for people who are always on-the-go and have a busy lifestyle. These bottles are compact, lightweight, and easy to carry around, making them the perfect companion for travellers, gym-goers, and outdoor enthusiasts.
They come in different sizes and capacities to suit different needs, and some models even have built-in blenders, so you can make your favorite smoothies and shakes wherever you are.
Advantages of Using Travel-Friendly Blender Bottles:
- Convenience: Travel-friendly blender bottles are compact and easy to carry around, so you don’t have to worry about finding a place to make your drinks or carrying bulky equipment.
- Portability: These bottles are designed to fit in most cup holders and backpacks, so you can take them with you wherever you go.
- Healthy Eating: With a travel-friendly blender bottle, you can make your own healthy drinks and snacks, even when you’re on the road.
- Savings: Instead of spending money on expensive pre-made drinks, you can make your own for a fraction of the cost.
How to Choose a Travel-Friendly Blender Bottle with the Right Ounces:
- Capacity: Consider the size of the bottle and the amount of drink you want to make. Some bottles have a capacity of 12 ounces, while others can hold up to 20 ounces.
- Material: Travel-friendly blender bottles are typically made of plastic or stainless steel. Plastic bottles are lighter, while stainless steel bottles are more durable.
- Built-in Blender: Some travel-friendly blender bottles have a built-in blender, while others don’t. If you want to make smoothies and shakes on the go, look for a bottle with a built-in blender.
- Leak-Proof: Make sure the bottle has a secure lid and is leak-proof, so you don’t have to worry about spills while you’re on the move.
Read about: What are the Coldest Water Bottles
Space-Saving Blender Bottle Capacity
Space-saving blender bottles are designed for people who have limited kitchen space or are looking to minimize clutter. These bottles have a compact design and can be stored easily in a small cabinet or cupboard.
They come in different sizes and capacities to suit different needs, and some models even have built-in blenders, making them a convenient and efficient solution for making smoothies and shakes at home.
Benefits of Using Space-Saving Blender Bottles:
- Compact Design: Space-saving blender bottles are designed to fit in small spaces and minimize clutter in your kitchen.
- Multifunctional: These bottles can be used for both blending and storage, saving you money and space.
- Healthy Eating: With a space-saving blender bottle, you can make your own healthy drinks and snacks, even when you have limited kitchen space.
- Efficient: These bottles are easy to use and clean, making them a convenient and efficient solution for making smoothies and shakes.
How to Choose a Space-Saving Blender Bottle with the Right Capacity
Capacity: Consider the size of the bottle and the amount of drink you want to make. Some bottles have a capacity of 12 ounces, while others can hold up to 20 ounces.
- Material: Space-saving blender bottles are typically made of plastic or stainless steel. Plastic bottles are lighter, while stainless steel bottles are more durable.
- Built-in Blender: Some space-saving blender bottles have a built-in blender, while others don’t. If you want to make smoothies and shakes, look for a bottle with a built-in blender.
- Ease of Use: Look for a bottle that is easy to use and clean, with a secure lid and leak-proof design. This will ensure that you can make your drinks quickly and efficiently, without having to worry about spills or messes.
FAQs
How much Oz is my Blender Bottle?
The BlenderBottle Classic 28-Ounce Shaker Bottle has a capacity of 28 ounces. It can be used as both a shaker and a water bottle, and the ball inside will not rust, chip, or peel. Additionally, it is BPA and phthalate-free, and dishwasher-safe.
What size Blender Bottle should I get?
- Purpose: Will you be using your BlenderBottle for mixing protein shakes, pre-workout drinks, or just for carrying water? The amount of liquid you need will vary depending on the purpose.
- Portability: Consider the size and weight of the bottle. If you’ll be carrying it around with you, a smaller size may be more convenient.
- Capacity: The most common sizes for BlenderBottles range from 20 to 28 ounces. Choose the size that best fits your needs.
- Storage: Consider where you will store the bottle. If you have limited space, a smaller size may be more appropriate.
How many ml of water is in a Blender Bottle?
A BlenderBottle with a capacity of 28 ounces is equal to approximately 828 milliliters of water. Keep in mind that the exact capacity may vary slightly depending on the specific BlenderBottle product and any measurement inaccuracies.
How many ounces are in a bottle of a shaker?
The number of ounces in a shaker bottle can vary. It depends on the specific product and its capacity. Some common sizes for shaker bottles are 16, 20, 24, and 28 ounces. It is important to consult the product specifications or labeling to determine the exact capacity of a particular shaker bottle.
Conclusion
the number of ounces in a small Blender Bottle can vary depending on the specific product. The most common sizes for small Blender Bottles range from 16 to 24 ounces, with some bottles offering a capacity as low as 12 ounces and others as high as 28 ounces. When choosing a small Blender Bottle,
it is important to consider factors such as the purpose of use, portability, capacity, and storage space. Ultimately, the size you choose will depend on your personal needs and preferences. Before making a purchase, make sure to consult the product specifications or labeling to determine the exact capacity of the bottle you are interested in.
Read more about Blender Bottles
Best Bottles for Breastfed Babies of 2023

As a new parent, you want to give your baby the best of everything and that includes finding the best bottle for breastfed babies. You have many options to choose from but with so many choices, it can be hard to decide. But don’t worry, we’re here to help. In this article, we’ll share with you the best bottles for breastfed babies in 2023 or in the coming years. We’ll also provide a buyer’s guide to help you choose the right bottle for your little one.
Before we understand the best bottle for breastfed babies we need to understand why breastmilk is best, as per my research When it comes to feeding your baby, there is no substitute for breastmilk. Not only is breastmilk more nutritious than formula, but it is also easier for your baby to digest. In addition, breastmilk can help to prevent illnesses such as ear infections and respiratory infections. There are a few things to keep in mind when you are feeding your breastfed baby from a bottle.
First of all, it is important to use a bottle that is designed for breastfed babies. These bottles have special features that help to reduce gas and colic. Additionally, you will want to make sure that the nipple of the bottle is the correct size for your baby. A good rule of thumb is to choose a nipple that is the same size as your baby’s mouth.
Here are the few Pros and Cons of breastfed
-Pros:
1. Breastmilk is packed with nutrients that are essential for a baby’s development.
2. Breastmilk is easy to digest for a baby’s delicate stomach.
3. Breastmilk boosts a baby’s immune system.
4. Breastmilk is always the perfect temperature for a baby.
5. Breastfeeding is a bonding experience for mother and child.
-Cons:
1. Some mothers may not be able to produce enough breast milk.
2. Breastmilk can leak at inopportune times.
3. Nursing in public can be uncomfortable for some mothers.
4. It can be difficult to pump breastmilk when returning to work outside the home.
5. Babies can develop a preference for the bottle over the breast, which can make weaning difficult.
The best bottles for breastfed babies of 2023
As a new mother, you want what’s best for your baby. And when it comes to feeding, you want to make sure you choose the best bottles for breastfed babies. With so many options on the market, it can be hard to know which ones are truly the best. But don’t worry, we’re here to help. We’ve done the research and compiled a list of the best bottles for breastfed babies in 2021. From anti-colic bottles to ones that mimic the breast, we’ve got you covered. So whether you’re looking for the perfect bottle for your little one or trying to find one that will make breastfeeding easier, read on. These are the best bottles for breastfed babies in 2021.
Medela Calma Breast Milk Feeding Nipple

Here are a few reasons, why Medela Calma Breast Milk Feeding Nipple.
- Medela Calma is designed exclusively for breast milk feeding.
- The natural feeding behavior encourages an easy transition from bottle to breast.
- It includes a nipple, base, and cap.
- The wide, textured base helps prevent colic by allowing your baby to control the flow of milk.
- It is made of soft, silicone, and is BPA-free.
Where to buy: Medela Calma Breast Milk Feeding NippleL
Philips Avent NATURAL 2.0 BOTTLE

Here are a few reasons, why Philips Avent NATURAL 2.0 BOTTLE
- The wide breast-shaped teat promotes a natural latch-on similar to the breast, making it easy for your baby to combine breast and bottle feeding.
- The natural shape of the teat helps the baby to continue latching correctly.
- The teat is made of soft, flexible silicone that feels natural to the touch.
- The wide base of the teat helps to prevent collapsing.
- The anti-colic valve allows air to enter the bottle, which prevents vacuum buildup and reduces colic symptoms.
Where to buy: Philips Avent NATURAL
Read More: What are the Coldest Water Bottles
Comotomo Natural Feel Baby Bottle

Here are a few reasons, why Comotomo Natural Feel Baby Bottle
- The soft, silicone nipples are ideal for babies who have trouble breastfeeding.
- The Comotomo Silicone Baby Bottles feature an innovative and sensible design to most closely mimic natural breastfeeding.
- The bottles are made of BPA-free and Phthalate-free materials.
- The bottles are dishwasher and microwave safe.
- The Comotomo Silicone Baby Bottles come in two sizes: 5 oz and 8 oz.
Where to buy: Comotomo Natural Feel Baby Bottle
Read More: Which water bottle is Good for Health in United States
In conclusion, the best bottles for breastfed babies of 2023 are the Tommee Tippee Closer to Nature Fiesta Bottle, the Philips Avent Natural Bottle, and the Nuk First Choice+ Bottle. All three of these bottles have unique features that make them ideal for breastfed babies. So if you are looking for the best bottle for your breastfed baby, be sure to check out one of these three options.
5 Remarkable Tips To Keep Bottle Warm When Traveling
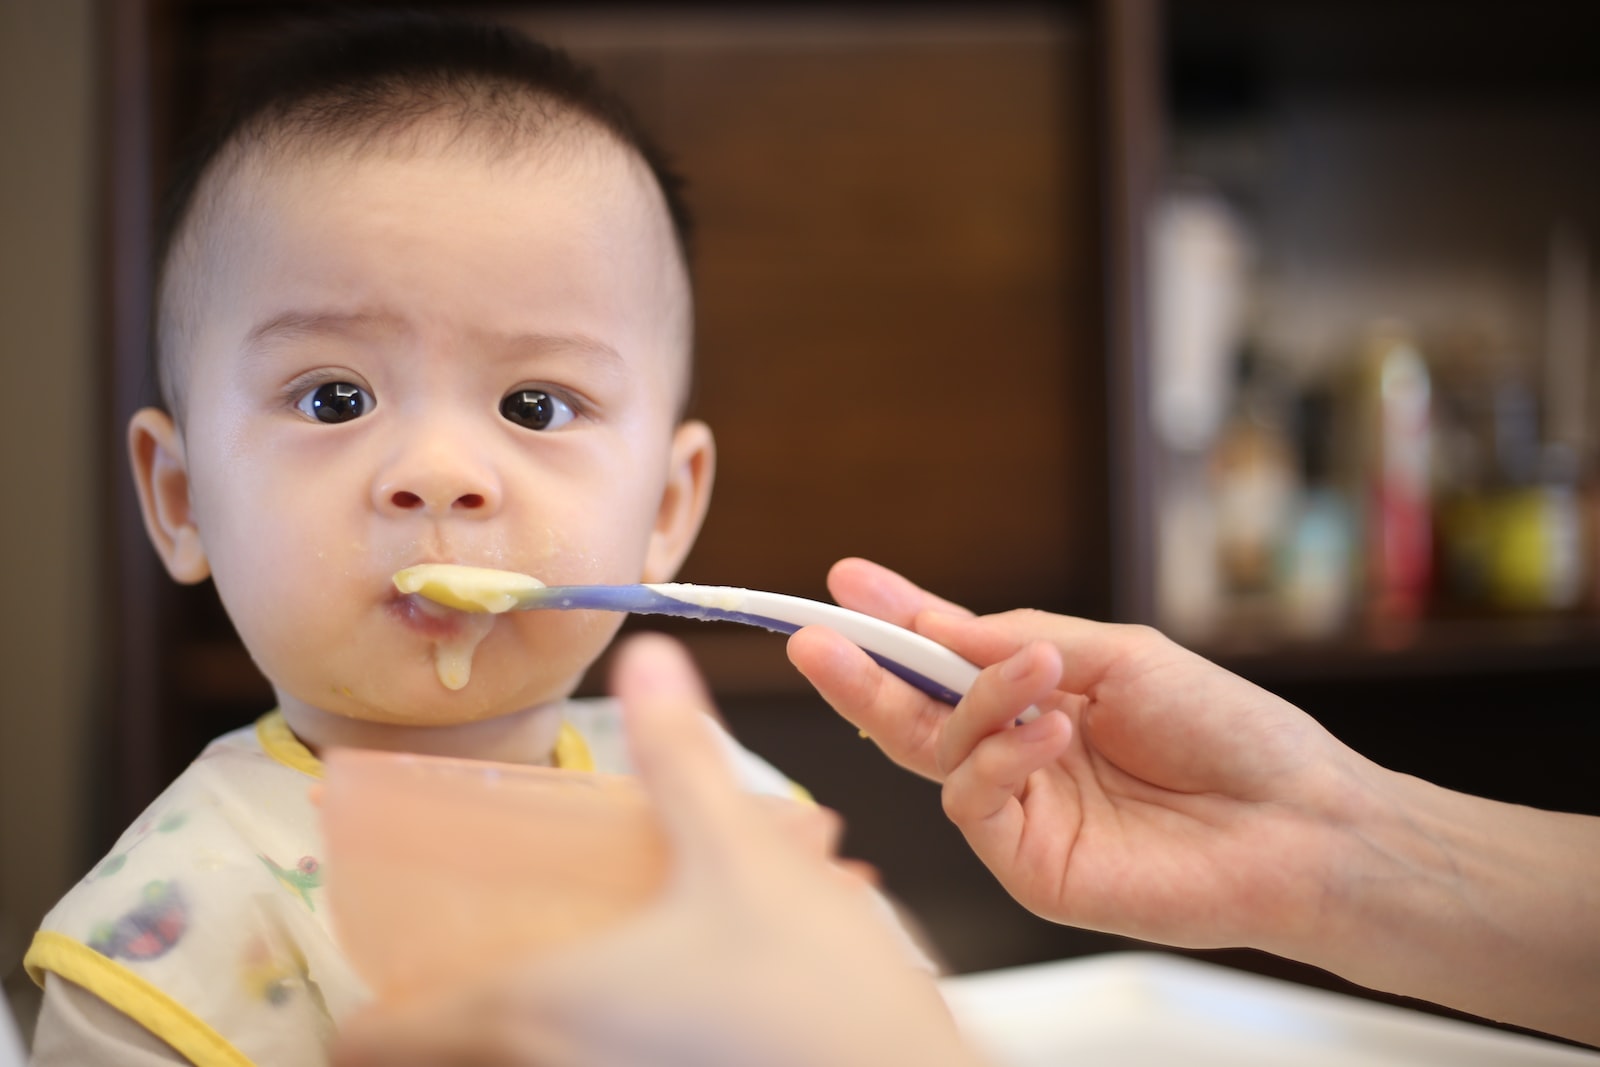
There can be thousands of different reasons to keep a bottle warm when you are traveling but one of the most formal reasons is warming a bottle for a baby, so In this article, we will learn how to keep a bottle warm when you are traveling with your family, so when you are on the go and need to keep your baby’s bottle warm.
I would like to ask you why keeping your bottle warm is important for a baby, I would like to know your experience. I think It can be difficult to find a place to warm a baby’s bottle when traveling. A bottle and food warmer set can be portable and easy to use. The warmer can fit into a diaper bag and be used in the car or hotel room. It is also easy to clean and sterilize.
How to keep your bottle warm when traveling

When you’re on the go, it can be difficult to keep your water bottle at a comfortable temperature. If you’re traveling in a cold climate, you may find that your water freezes solid within minutes. And in a hot climate, your water can become too warm to drink. Here are a few tips to help you keep your bottle at a comfortable temperature when traveling:
1. Use a thermos: A thermos is an insulated container that can keep your beverage hot or cold for hours. If you’re traveling in a cold climate, fill your thermos with hot water before you leave and top it off with boiling water throughout the day to keep it nice and warm. In a hot climate, fill your thermos with ice water and add fresh ice throughout the day to keep it cool.
2. Invest in a well-insulated bag. There are many great options on the market that will keep your bottle warm for hours.
3. If you’re going to be out all day, pack an extra bottle or two in case your first one gets cold.
4. If you can’t find a place to heat up your baby’s bottle, try using body heat. Wrap the bottle in a blanket and hold it close to your body to help keep it warm.
With these simple tips, you can rest assured that your baby’s bottle will stay nice and warm while you’re on the go!
There can be situations when your bottle gets cold, If you’re out and about and your water bottle gets cold, don’t worry! There are a few things you can do to make it drinkable again. First, if you have access to hot water, pour some into the bottle and let it sit for a few minutes. This will help raise the temperature of the water inside.
If you don’t have access to hot water, another option is to put the bottle in the sun for a little while. The heat from the sun will help warm up the water. And if neither of those options is available to you, simply hold the bottle close to your body for a bit. Your body heat will help warm up the water so it’s not as cold when you drink it.
How to make sure your bottle stays warm
You may not always have access to a microwave or stove when you’re out and about, but there are still ways to keep your bottle warm. Here are a few tips:
1. If you have access to hot water, fill up your bottle and let it sit for a few minutes before screwing on the lid.
2. Wrap your bottle in a scarf or blanket. This will help insulate it and keep the heat in.
3. If you’re using a metal bottle, you can fill it with boiling water and then empty it out just before screwing on the lid. This will pre-heat the metal so that it will help retain heat for longer.
When it comes to feeding your baby, you want to make sure you’re doing everything right. One thing you might not have thought about is keeping your baby’s bottle warm. Here’s why it’s important: Warm milk is more similar to breast milk, which is what your baby is used to. Room-temperature milk can be a shock to their system and cause stomach discomfort. Warm milk is also more easily digested by your baby’s stomach. This can help reduce gas and colic.
So next time you go to feed your baby, make sure the milk is nice and warm. It’ll make a world of difference for them!
Best Travel Bottle Warmer
When it comes to traveling with a baby, one of the most important things to consider is how you will keep your little one’s bottles warm. No one wants their baby to have a cold bottle of milk, so finding the best travel bottle warmer is essential. Here are a few things to look for when choosing the best travel bottle warmer for your needs.
First, you’ll want to make sure that the travel bottle warmer you choose can accommodate different sizes of bottles. You never know what size bottle your baby will need when you’re on the go, so it’s important to have a warmer that can handle anything from small to large.
Second, you’ll want to make sure that the travel bottle warmer is easy to use. The last thing you want is to be fumbling with buttons and cords when you’re trying to feed your hungry baby.
Learn what are the Best 5 Water Bottles for College Students
Few Best travel bottle warmer for babies
The first one on the list is The Classic, No-frills Bottle Warmer, here are the reasons why:
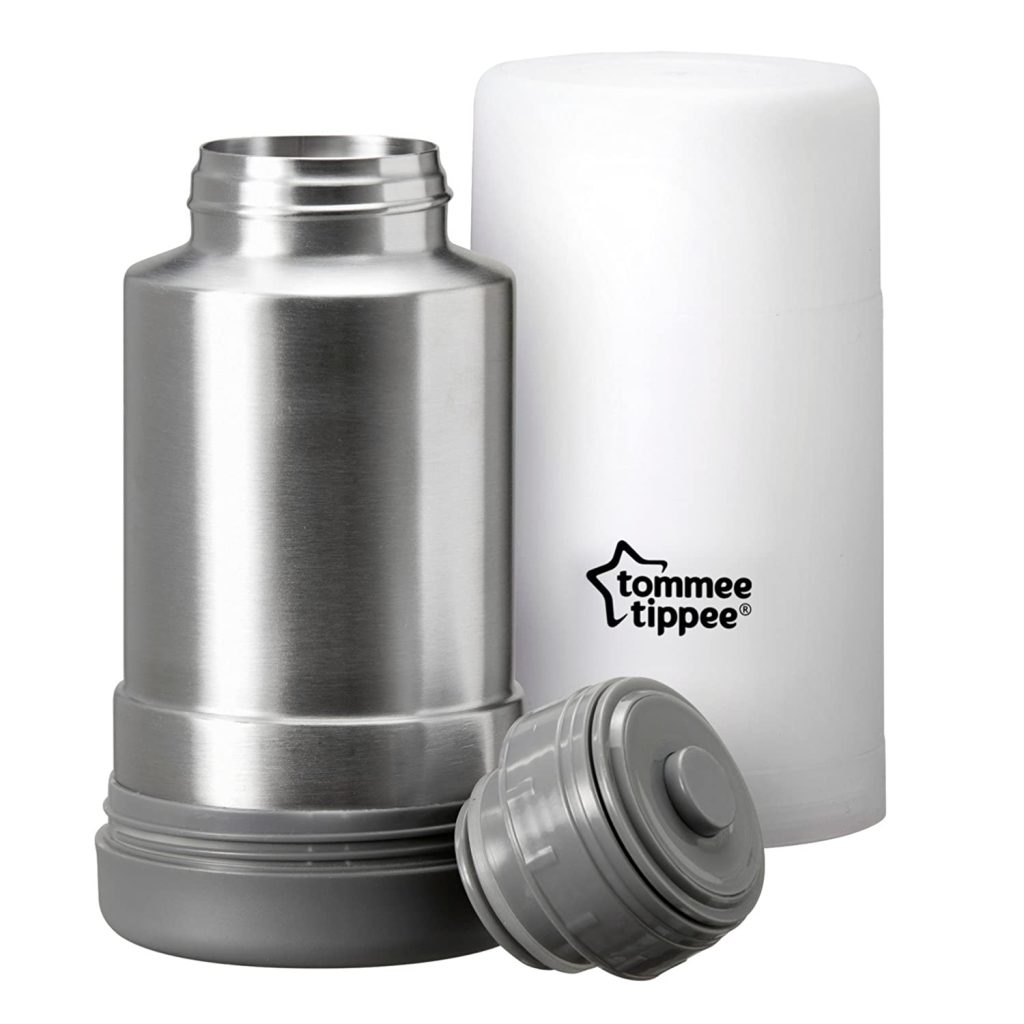
- The Tommee Tippee Travel Bottle and Food Warmer easily heats baby’s meal when you are on the go
- Designed for use with breastmilk, formula or baby food
- Portable and convenient, the thermal travel bag means no more cold food for baby
- Heats in as little as 4 minutes so you can be sure your little one is getting a hot meal
- Perfect for when you’re on the go and want to make sure your baby is getting a warm meal
The second one on the list is Munchkin 98° Digital Bottle Warmer, here are the reasons why:
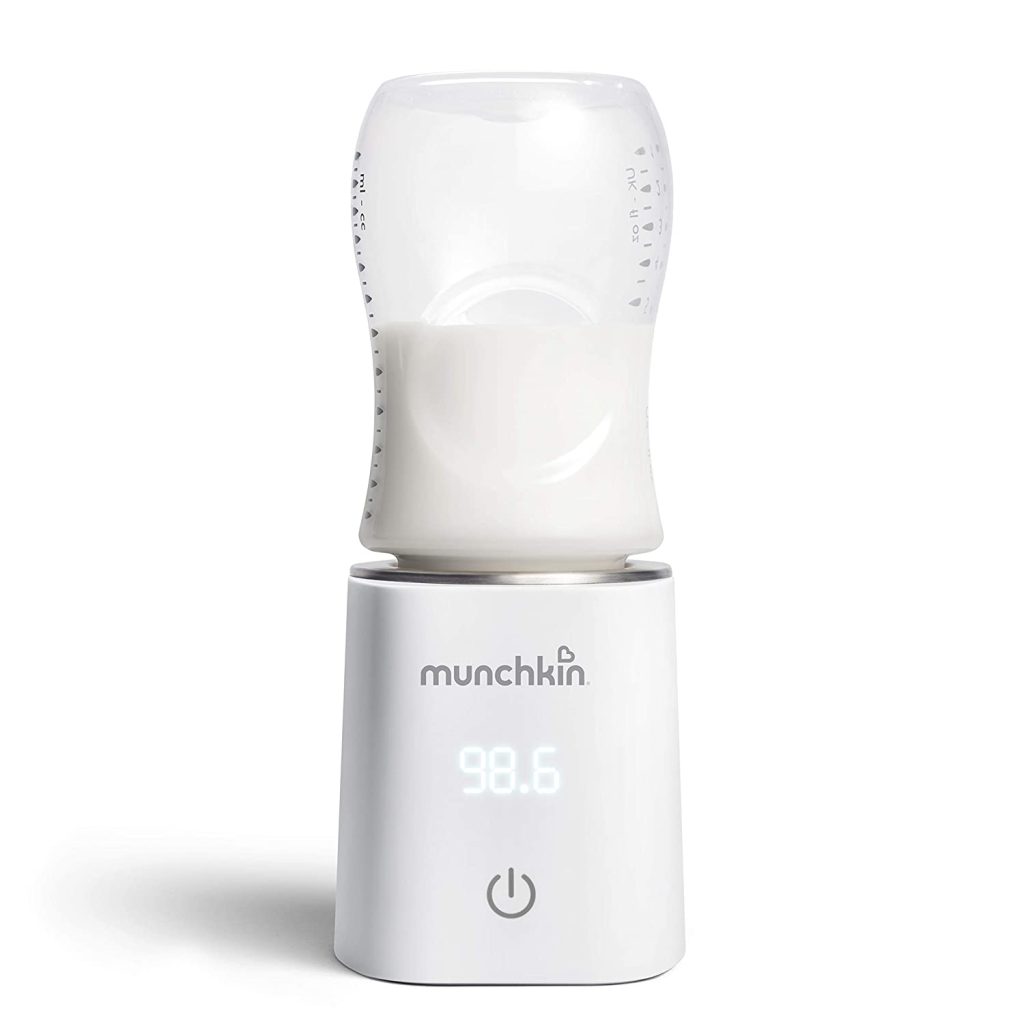
- Warms baby bottles quickly and evenly
- Conveniently displays the bottle’s temperature
- Safe to use with all bottle types
- Easy to operate with one hand
- The compact design makes it perfect for on-the-go
The third one on the list is Philips AVENT Fast Baby Bottle Warmer, here are the reasons why:
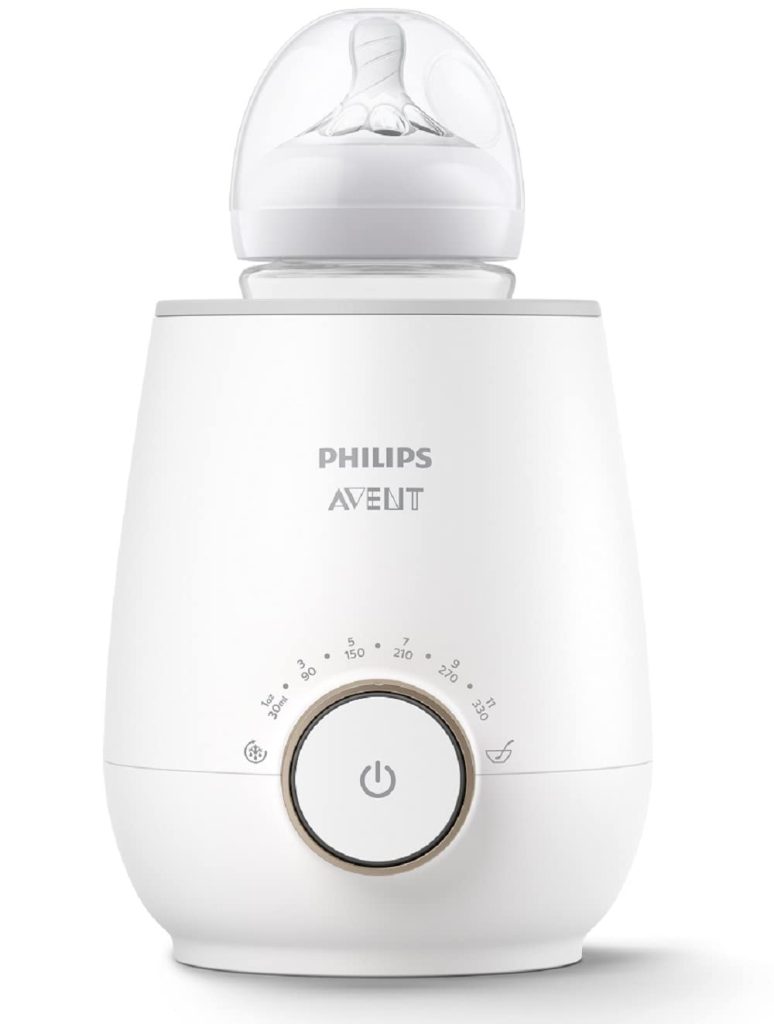
- The Philips AVENT Fast Baby Bottle Warmer SCF358 00 is a safe and easy way to make mealtime more comfortable for the baby.
- It gently heats a 5-ounce bottle in as few as 3 minutes.
- Milk circulates continuously during warming, so there are no hot spots.
- The warmer comes with a built-in timer that shuts off automatically.
- Its compact design makes it easy to store on a countertop or shelf.
In conclusion, it is important to warm a baby’s bottle when traveling because it can help the baby feel more comfortable and can prevent colic. Additionally, warming the bottle can help the baby sleep better and can make the formula easier to digest. Finally, warmed bottles are less likely to leak and less likely to break.

